Platform & Features
Sending a Bulk Message
How to send a bulk message
This is a detailed guide on setting up a bulk message, also known as a message blast, or mass text. The end-to-end process can be done in under one minute. Let's begin.
Step 1: Navigate to Lists & Segments in the main menu
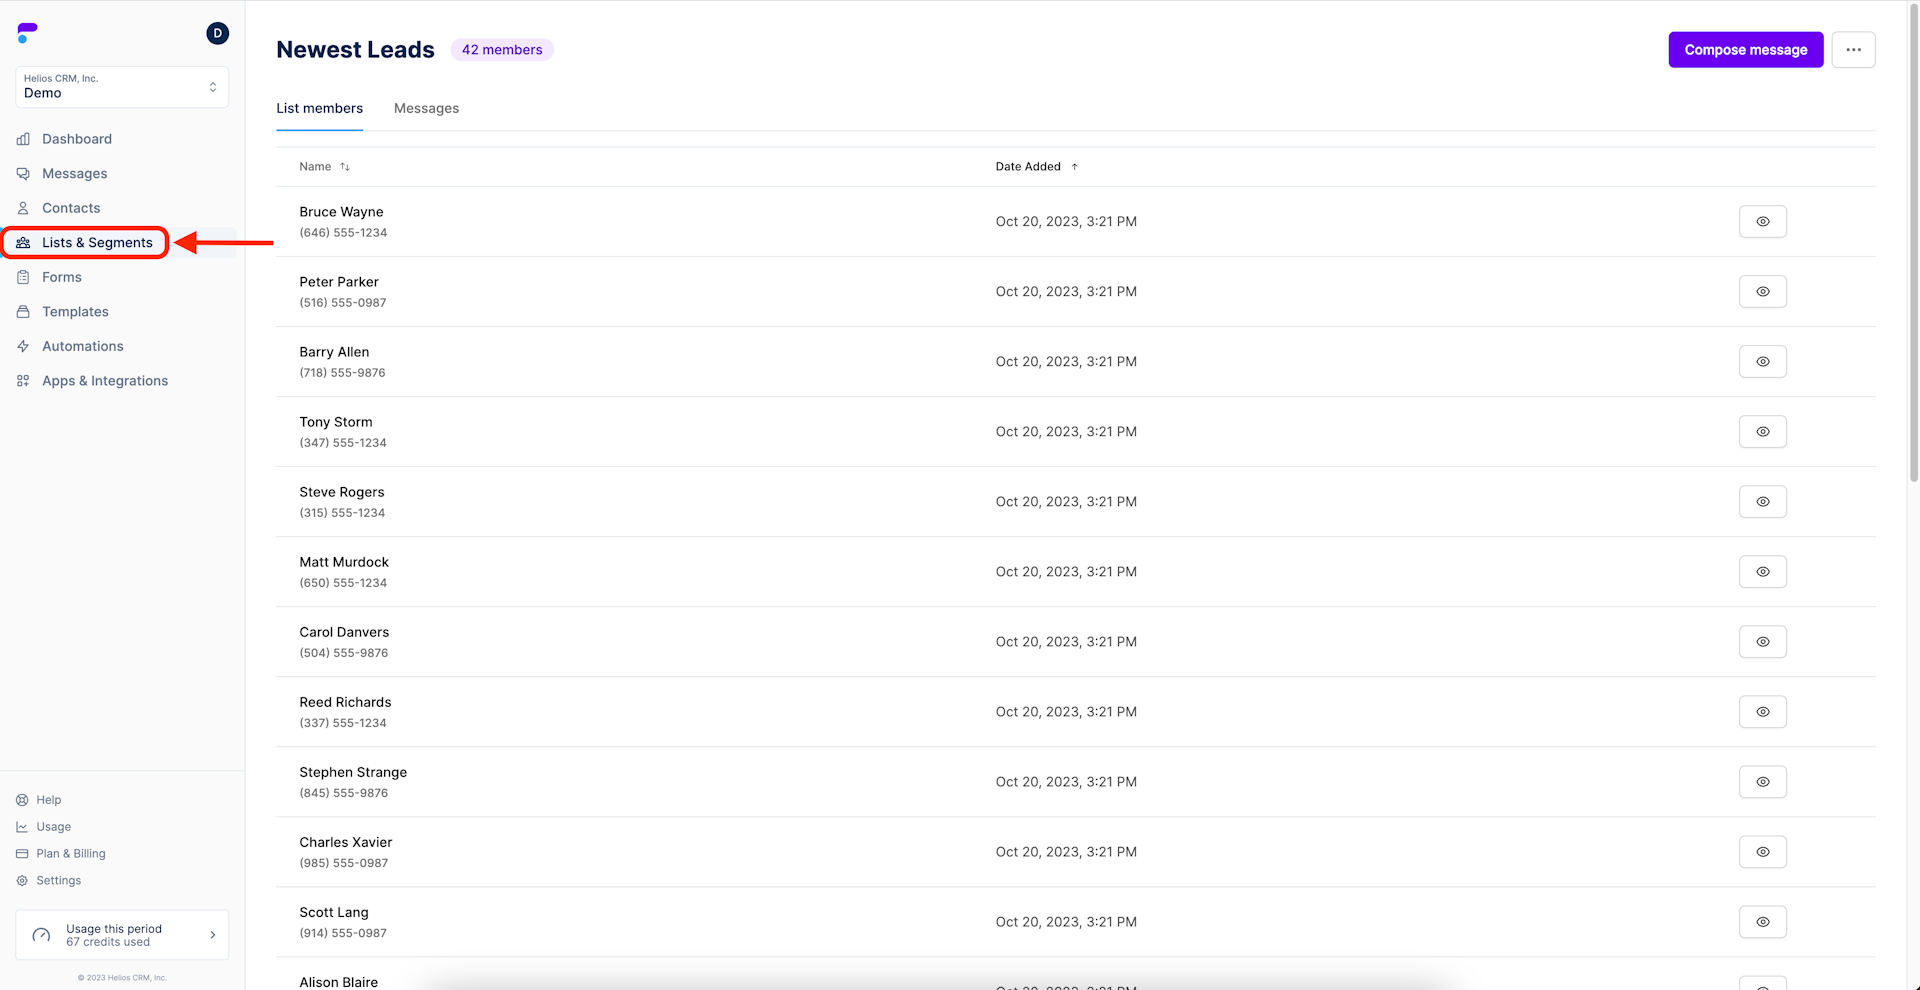
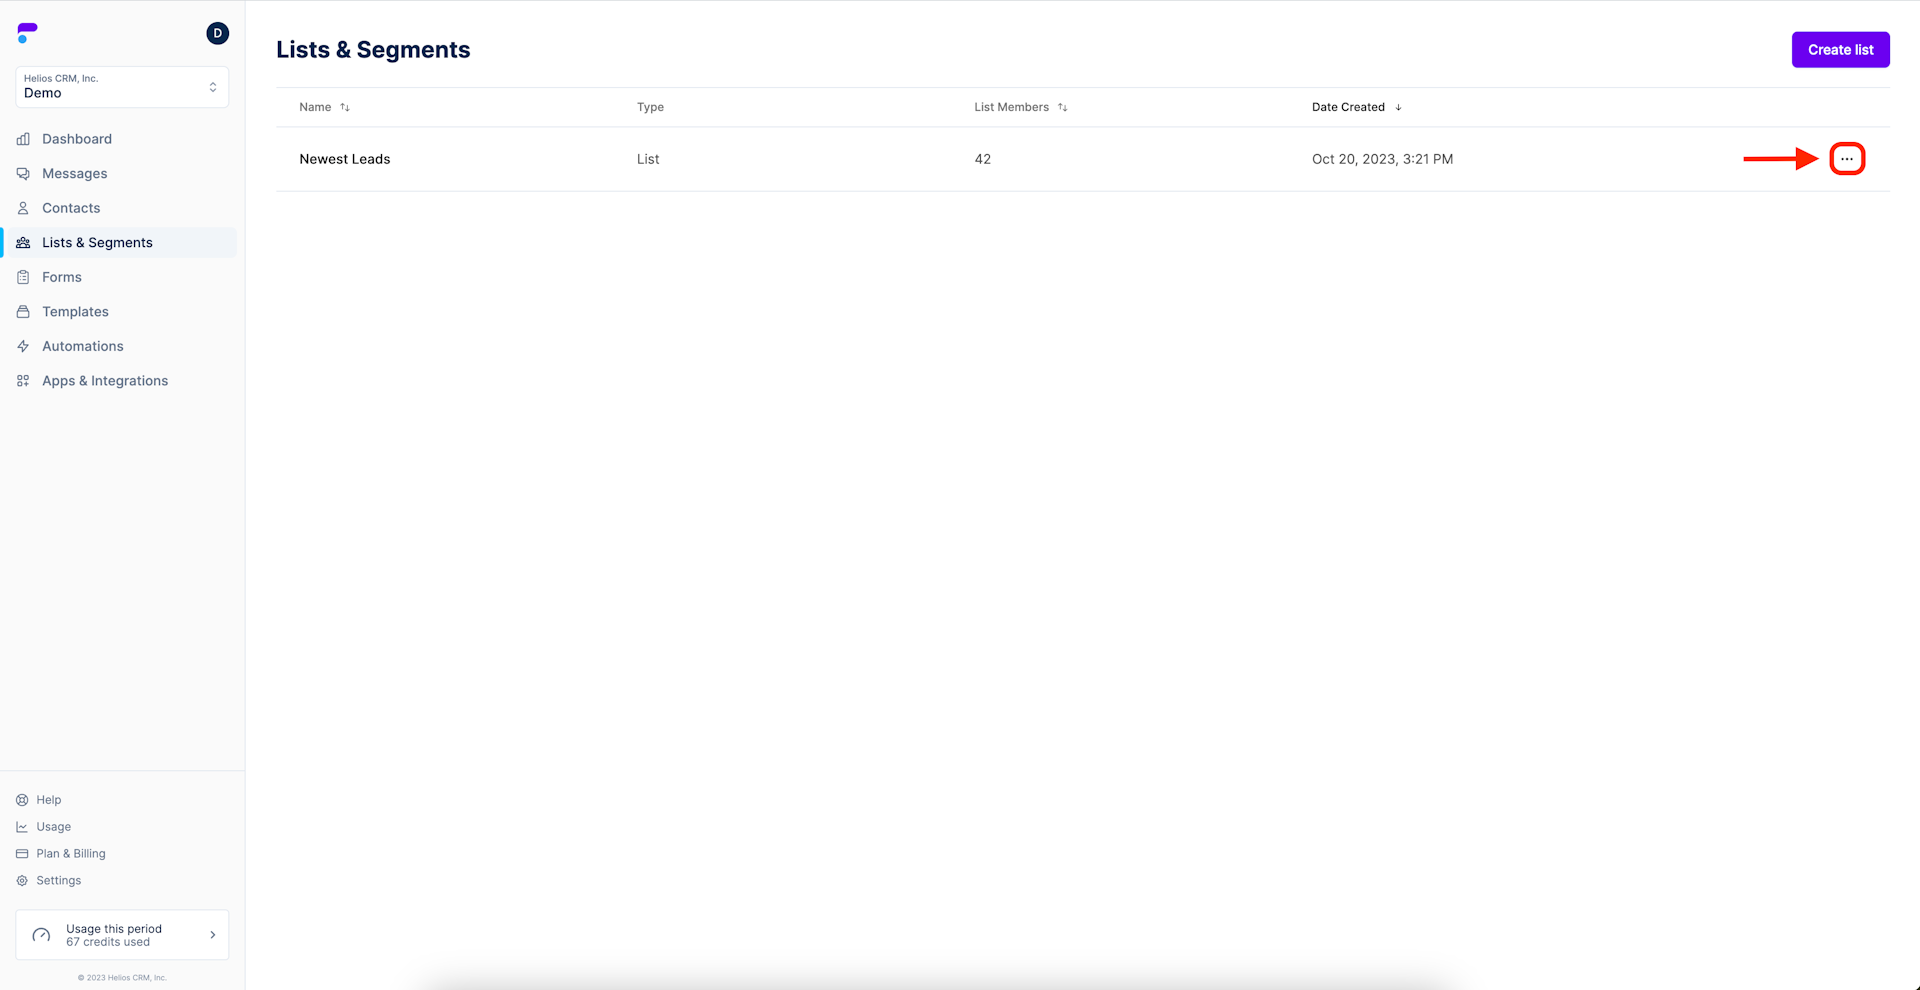
Step 2: Select the menu icon of the list you want to message
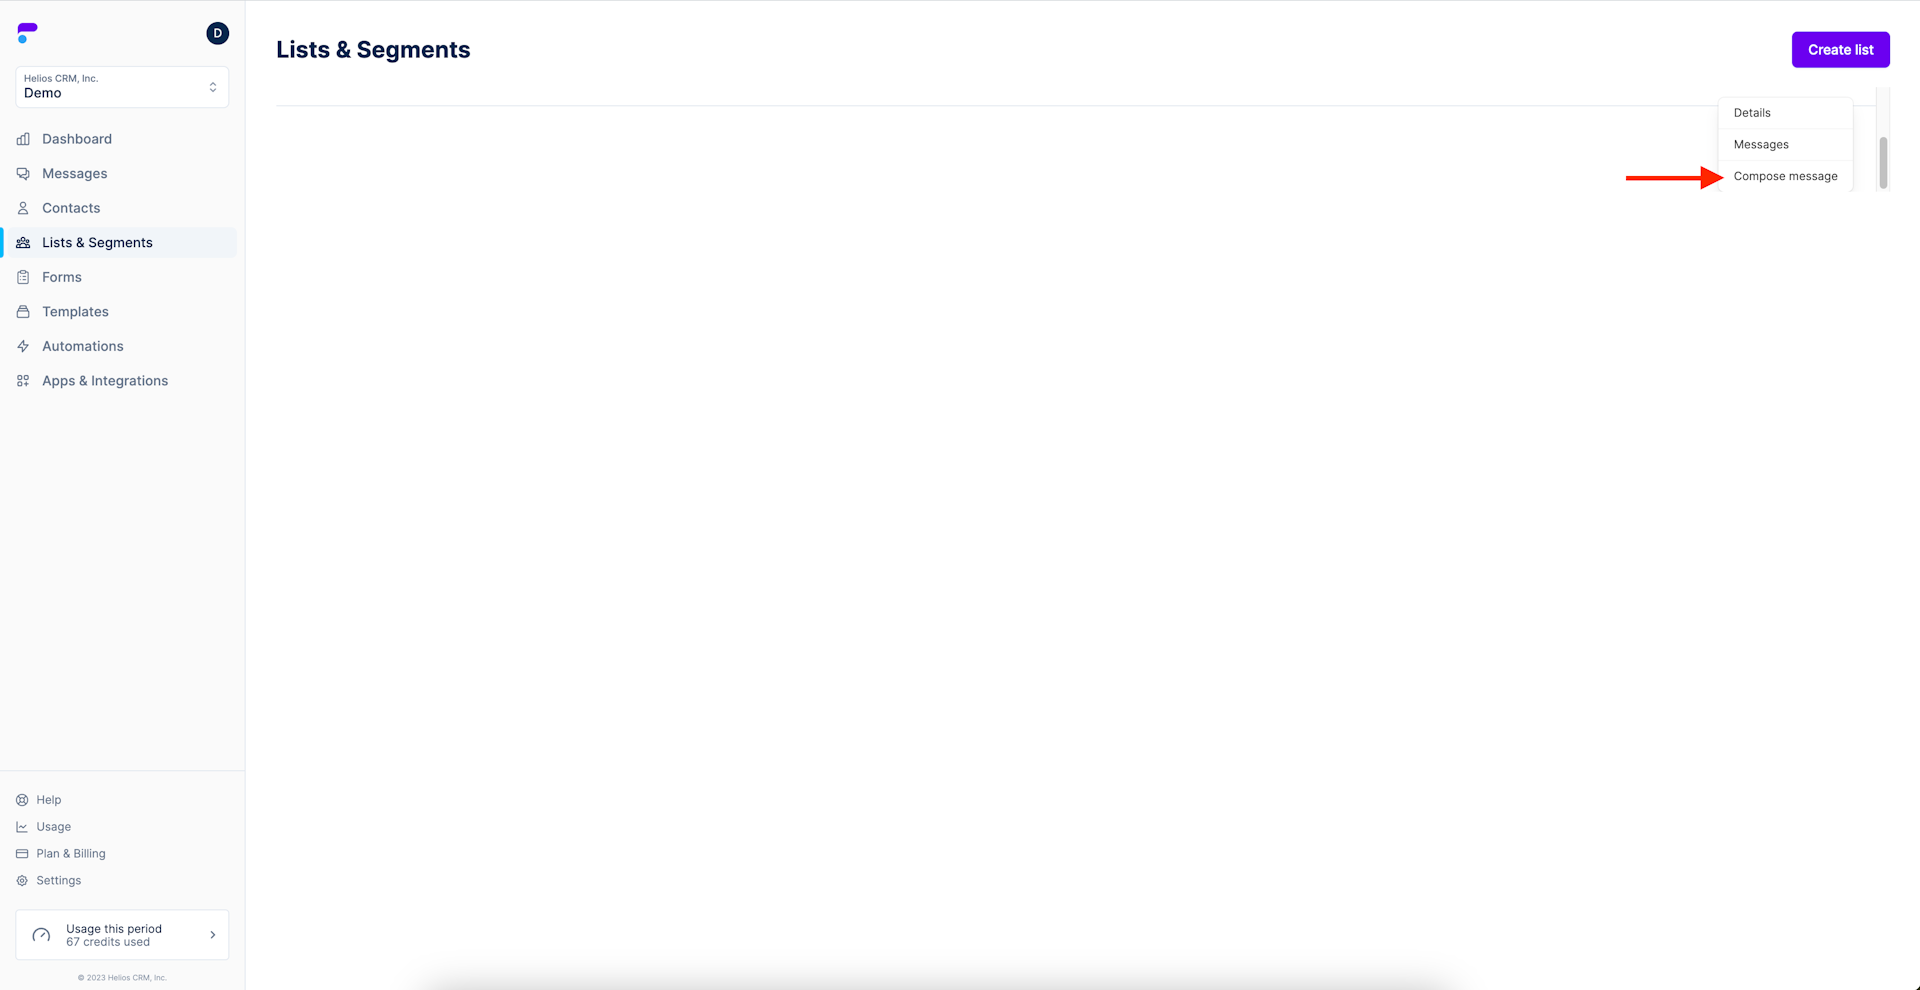
Step 3: Select Compose message from the drop down menu
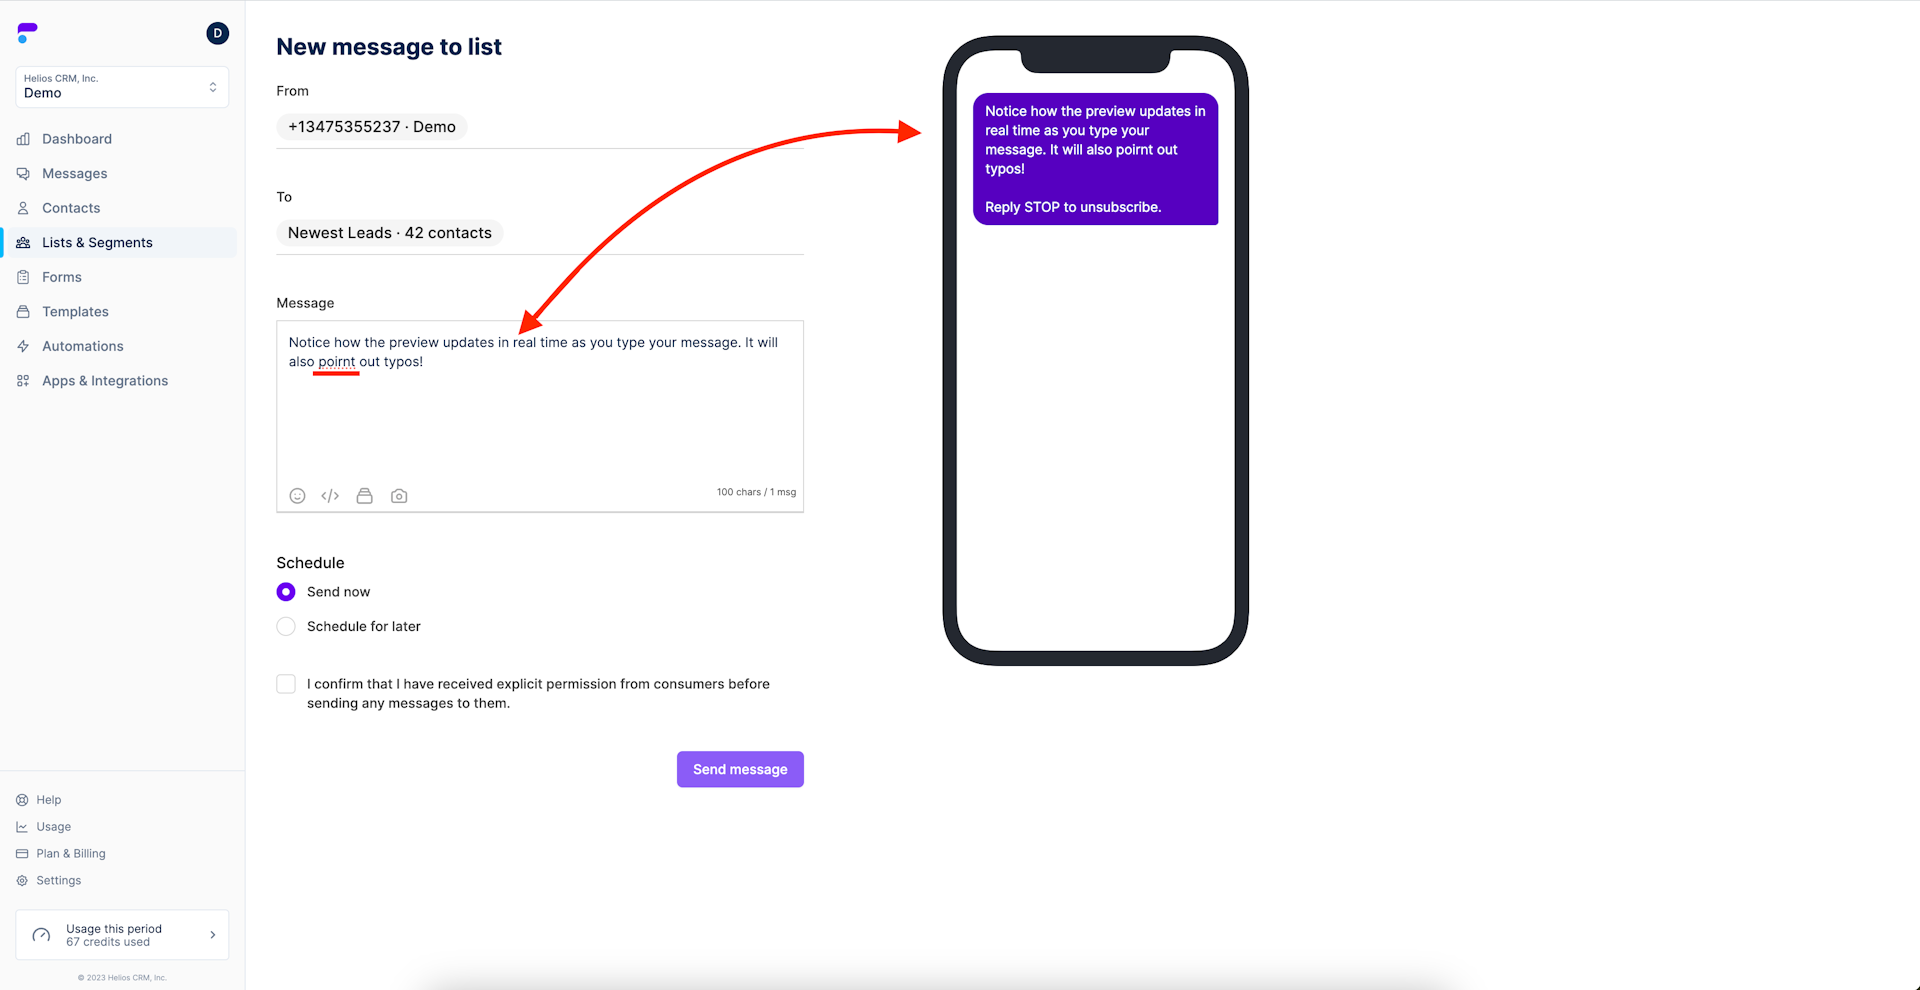
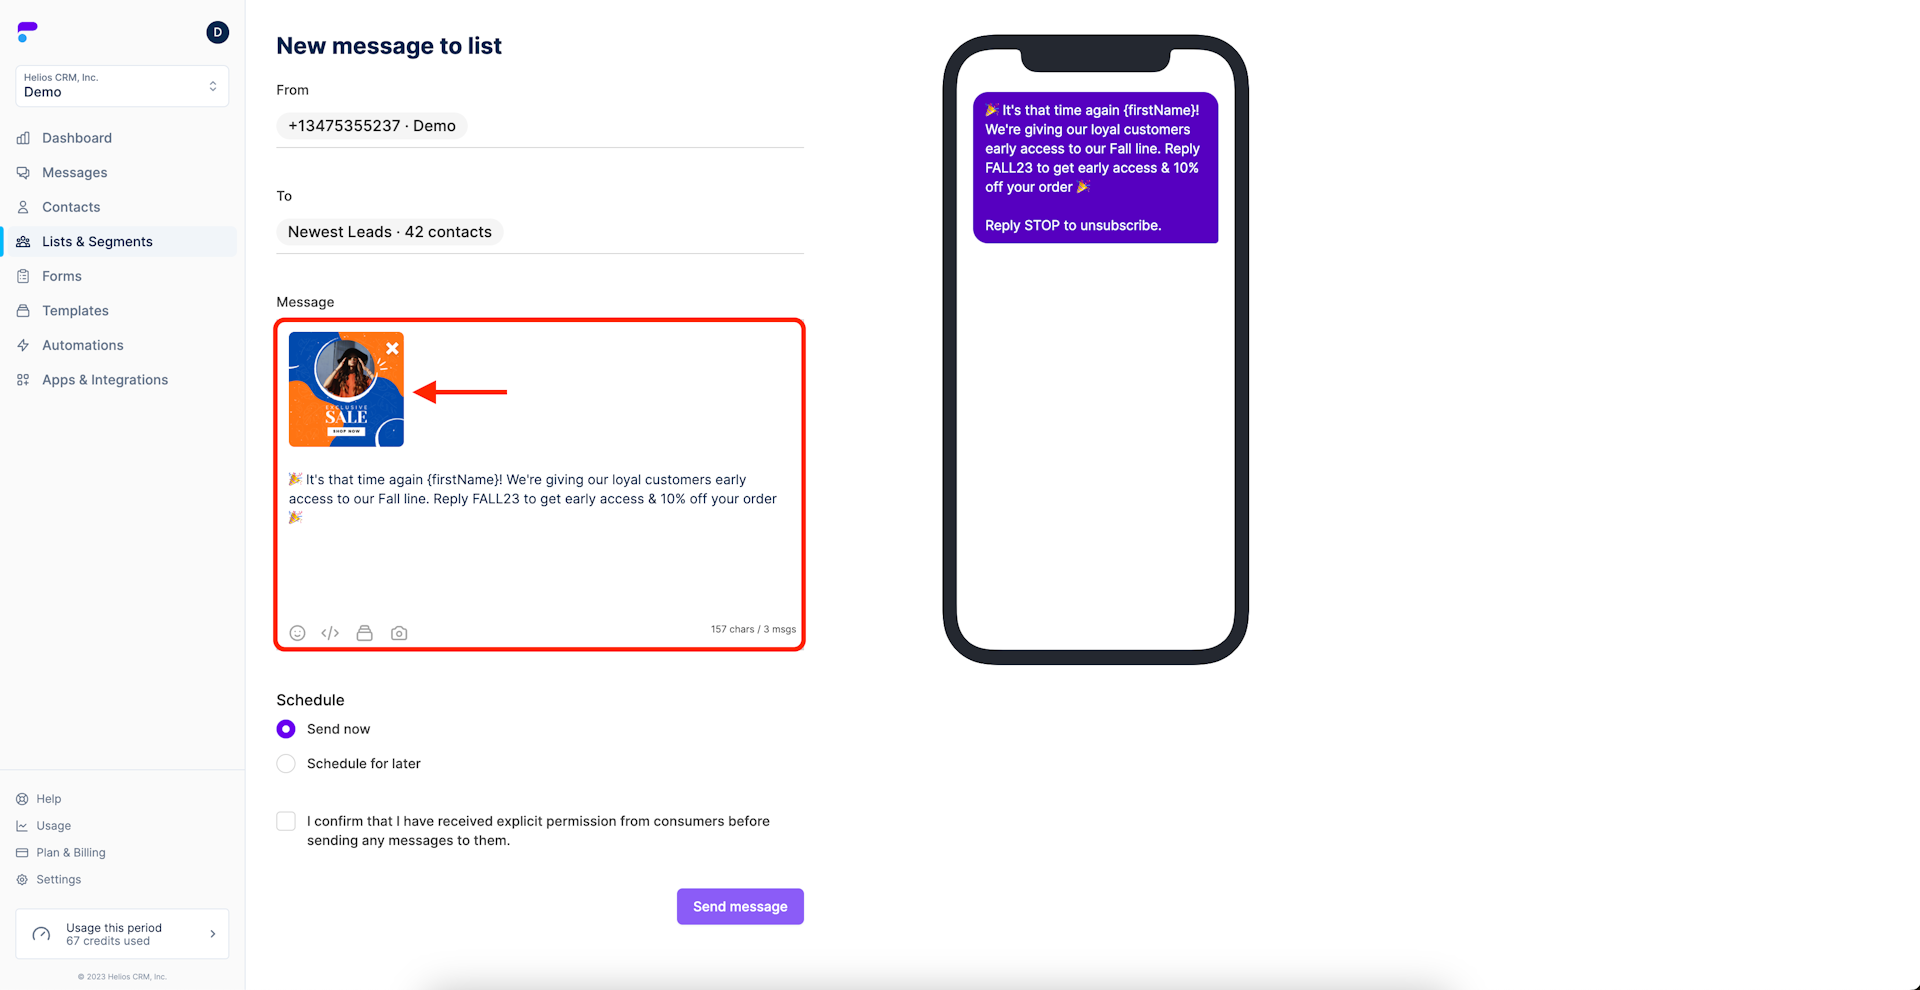
Step 4: Write your message
First, check that you are sending the message from the right phone number and inbox. This will be displayed on the top line.
Next, ensure that you are sending the message to the right audience segment. This is displayed on the second line.
Once you've verified your sender and recipient information, start typing the message you would like to send.
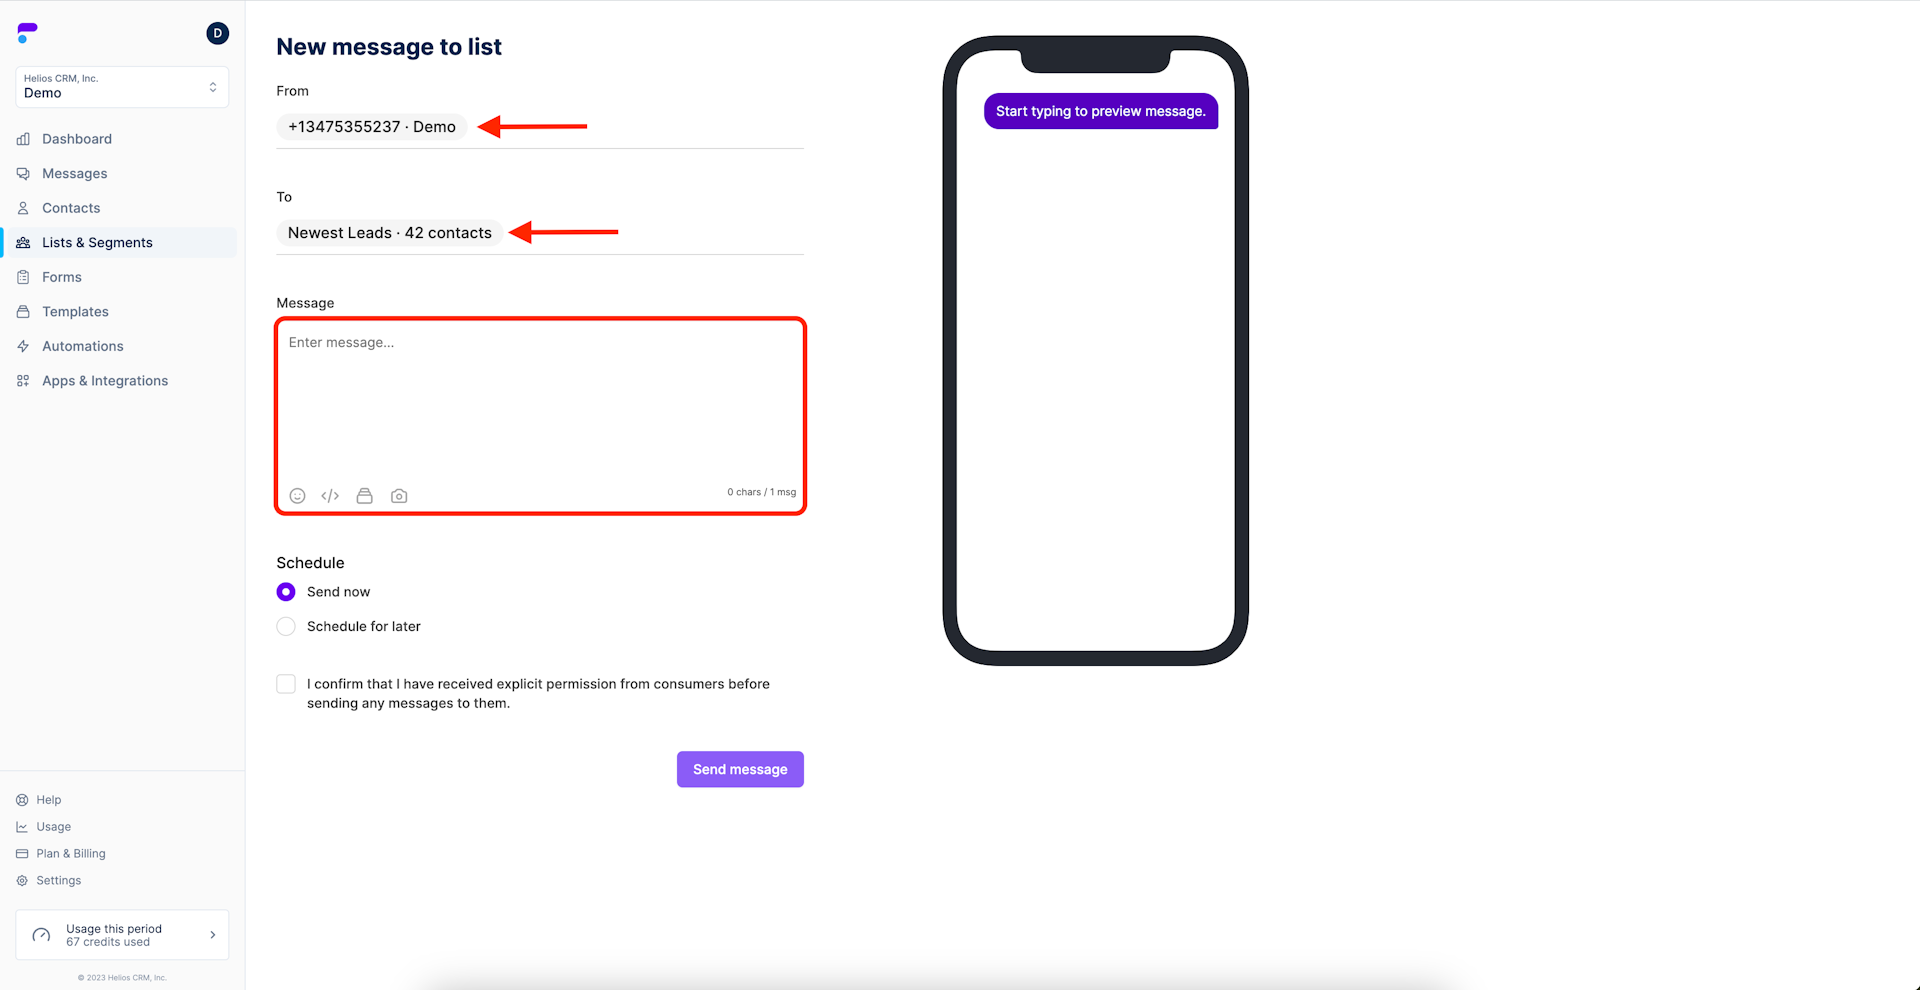
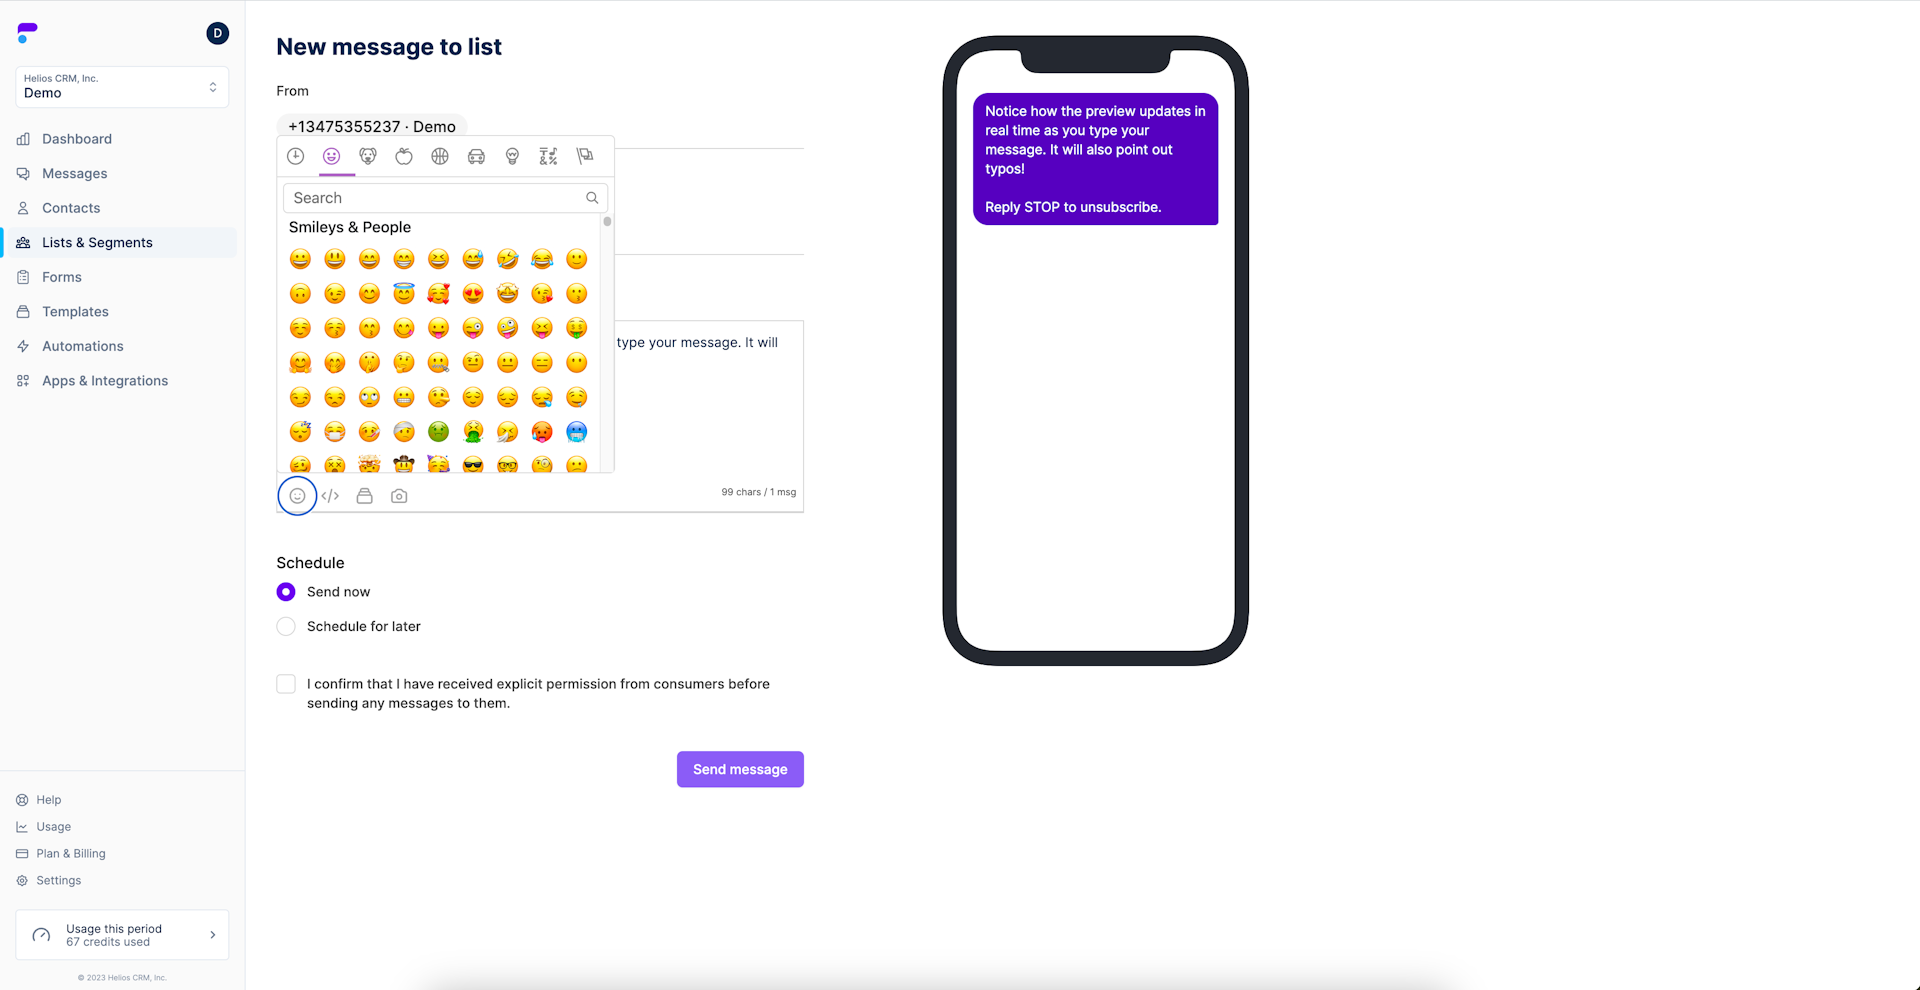
Step 5: Check your real-time message preview
As the message in the image states, you should notice the dynamic preview on the right hand side of the screen updates in real time as you enter text in the message box to the left of it.
The message box will also assist in pointing out typos so that your messages are always perfect.
Lastly, you'll notice the "Reply STOP to unsubscribe" text in the bottom of the message preview. This is part of Helios auto-compliance. While the sender is always responsible for their use, this feature helps to ensure your messages are effective and compliant.
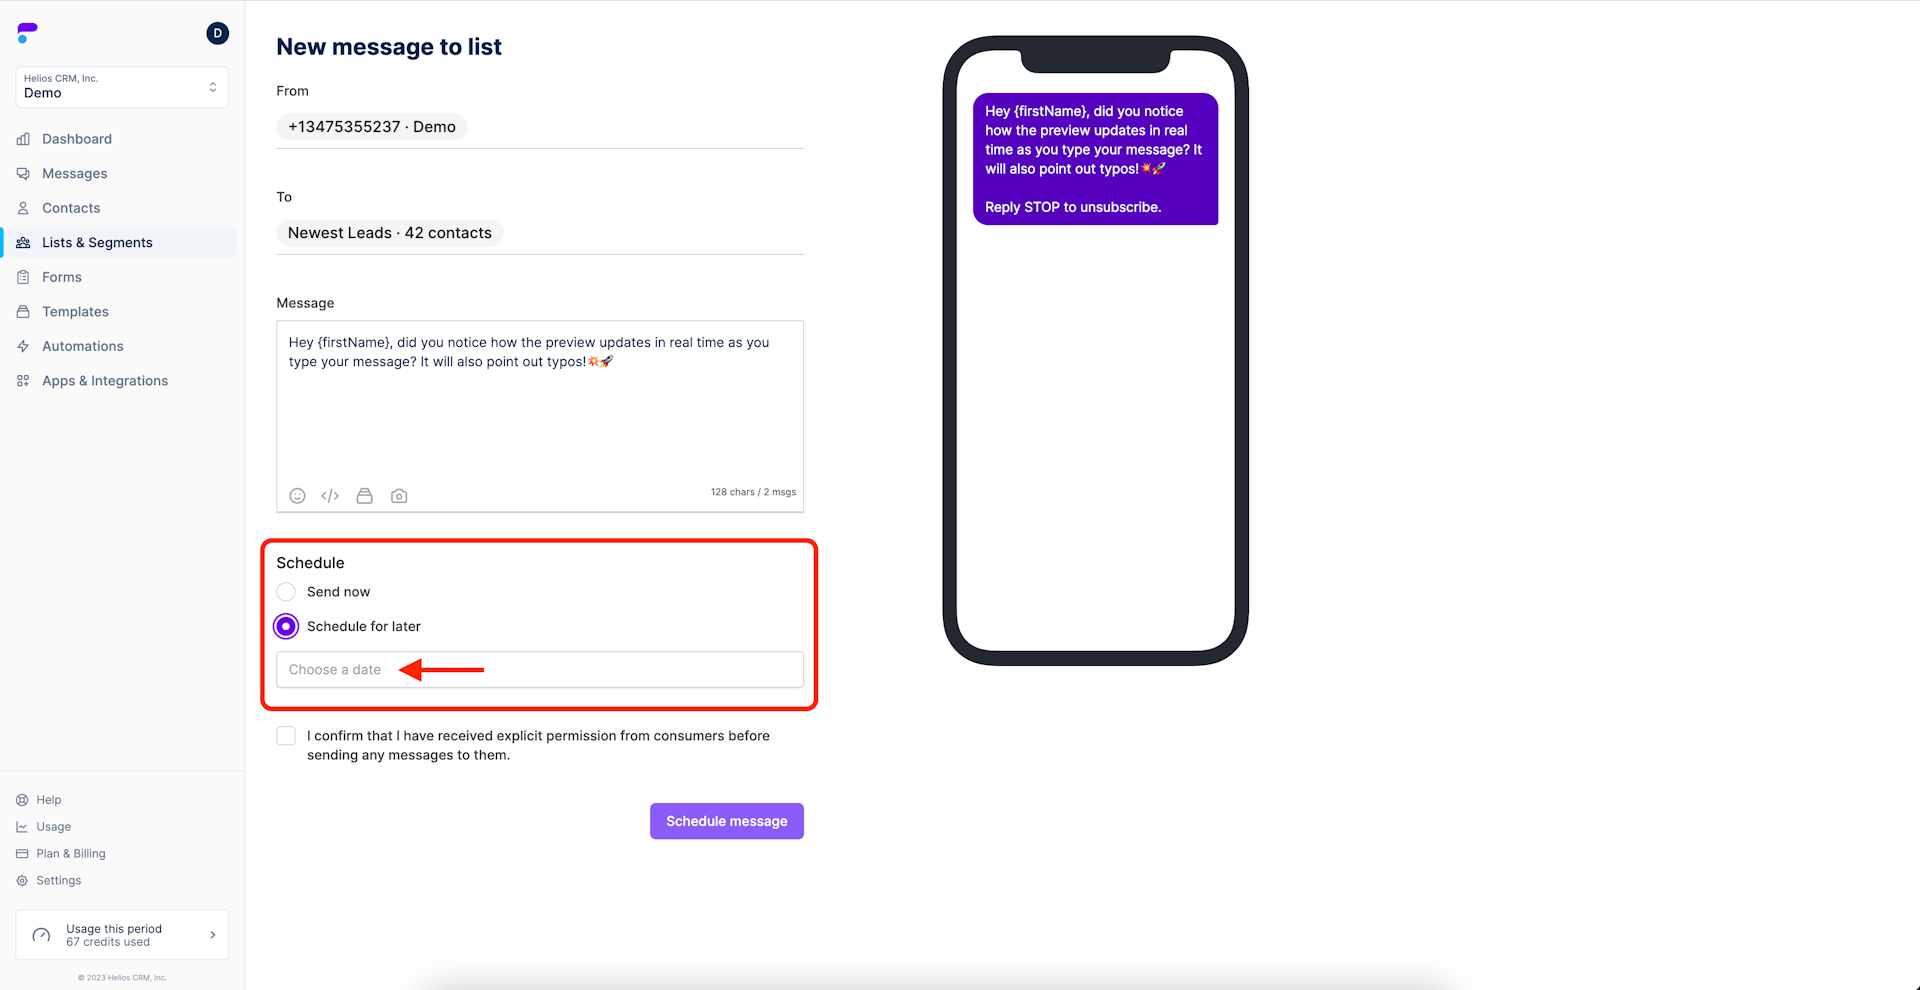
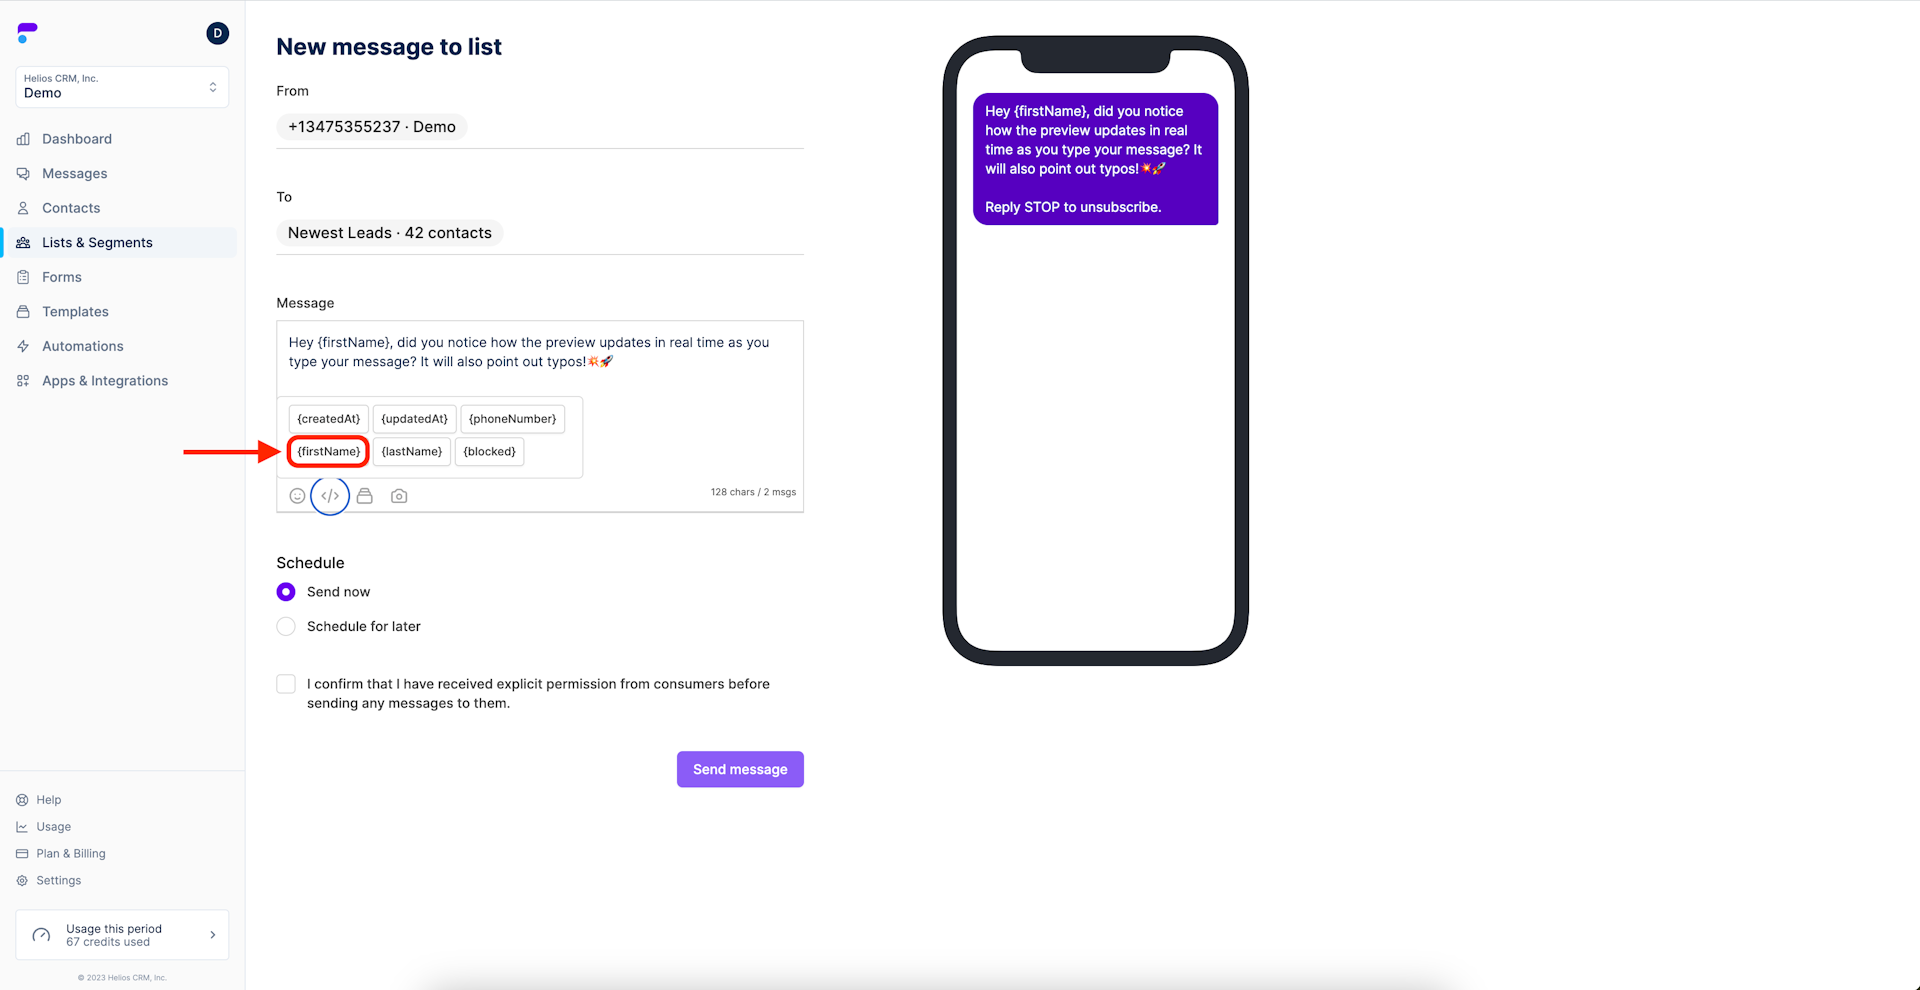
Step 6: Check your message counter
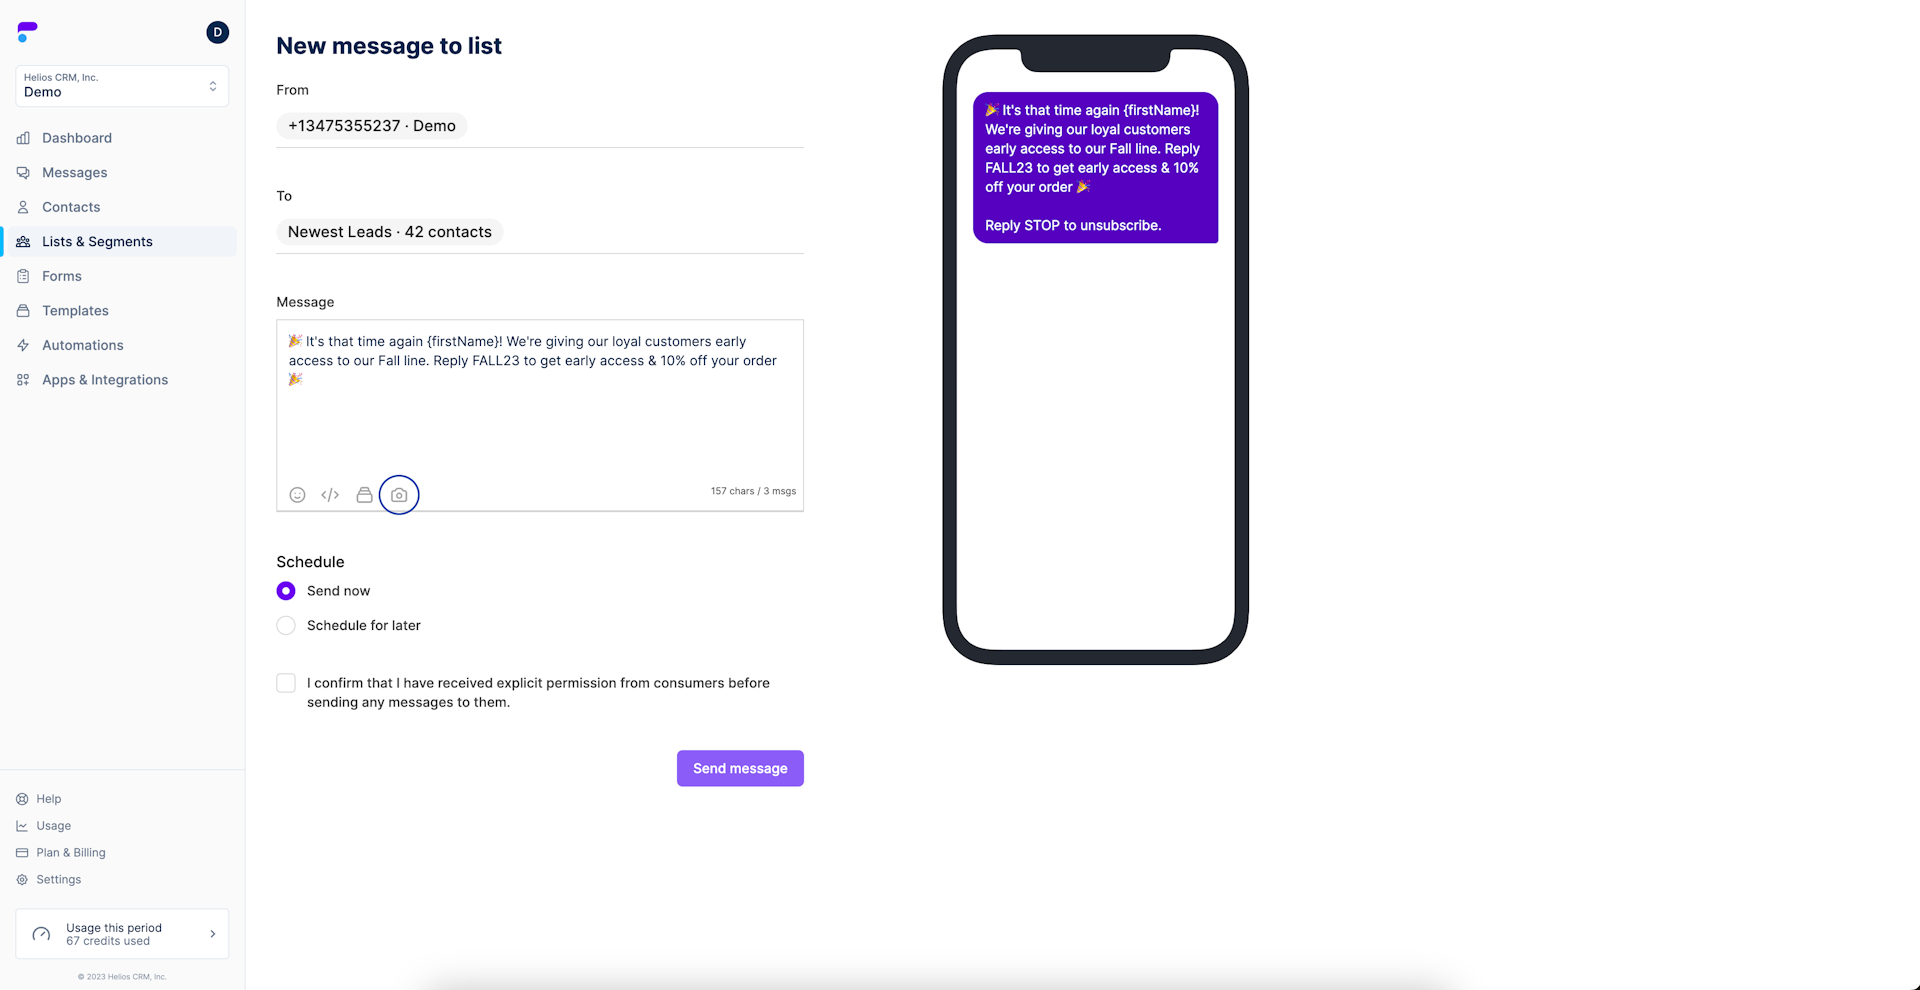
Notice that the text in the message was edited to be more natural. We also inserted the first name automation and two emojis for some flare.
The bottom right of the message builder will show the amount of characters and the amount of message credits that message will use.
In this instance, the lengthened body of text resulted in a text that will be 2 message credits. The example list is small, only 42 contacts. That means this message will use 84 message credits when it is sent.

Step 7: Choose to send your message instantly or schedule it for later
You can choose to send the message immediately, or, schedule it for a future date and time. Scheduling messages is more common so we've chosen to schedule the message in this example.
Click the checkbox next to Schedule for later.
Next click choose a date.
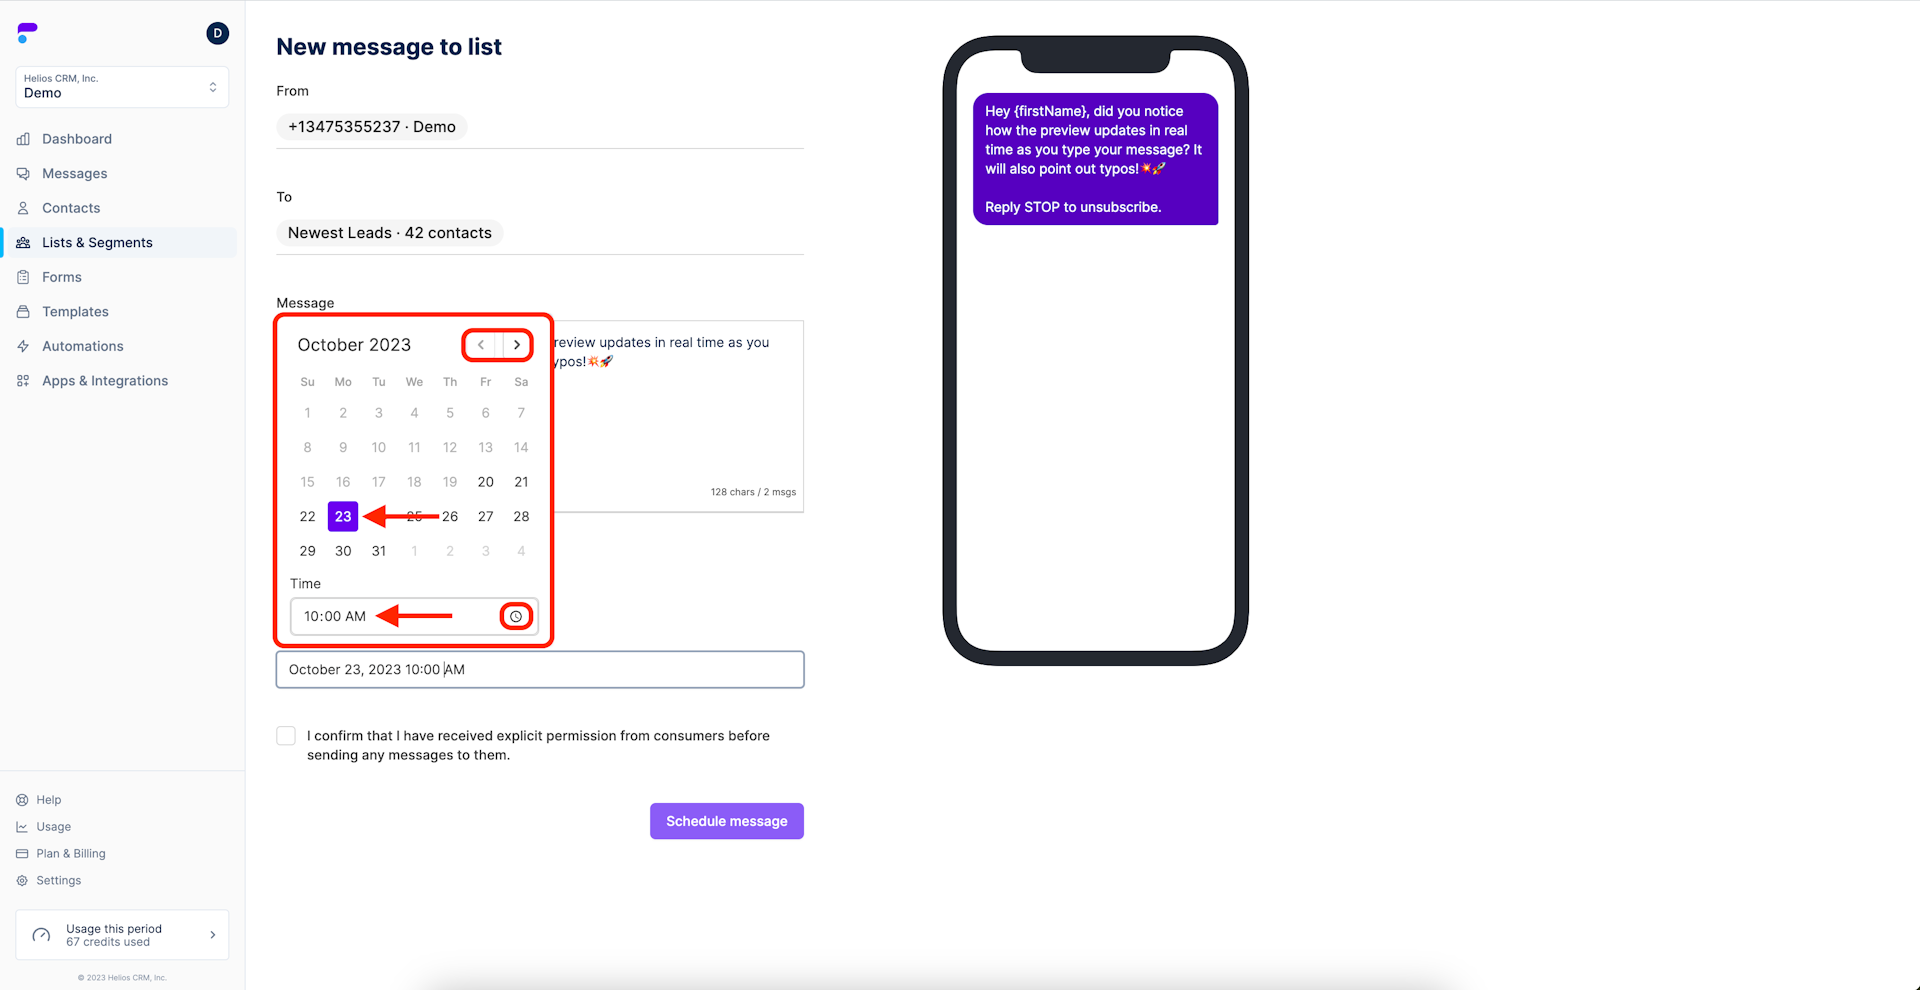
Step 8: Choose the date and time
The date picker will pop up. You can use the month arrows in the top right to change months.
Choose the day by clicking it.
Click the time icon and select your preferred time.
Note: the time you select is local to your account. This is worth considering if your audience is in different time zones. Some customers will segment their audience by timezone or create a new inbox and number for different time zones.
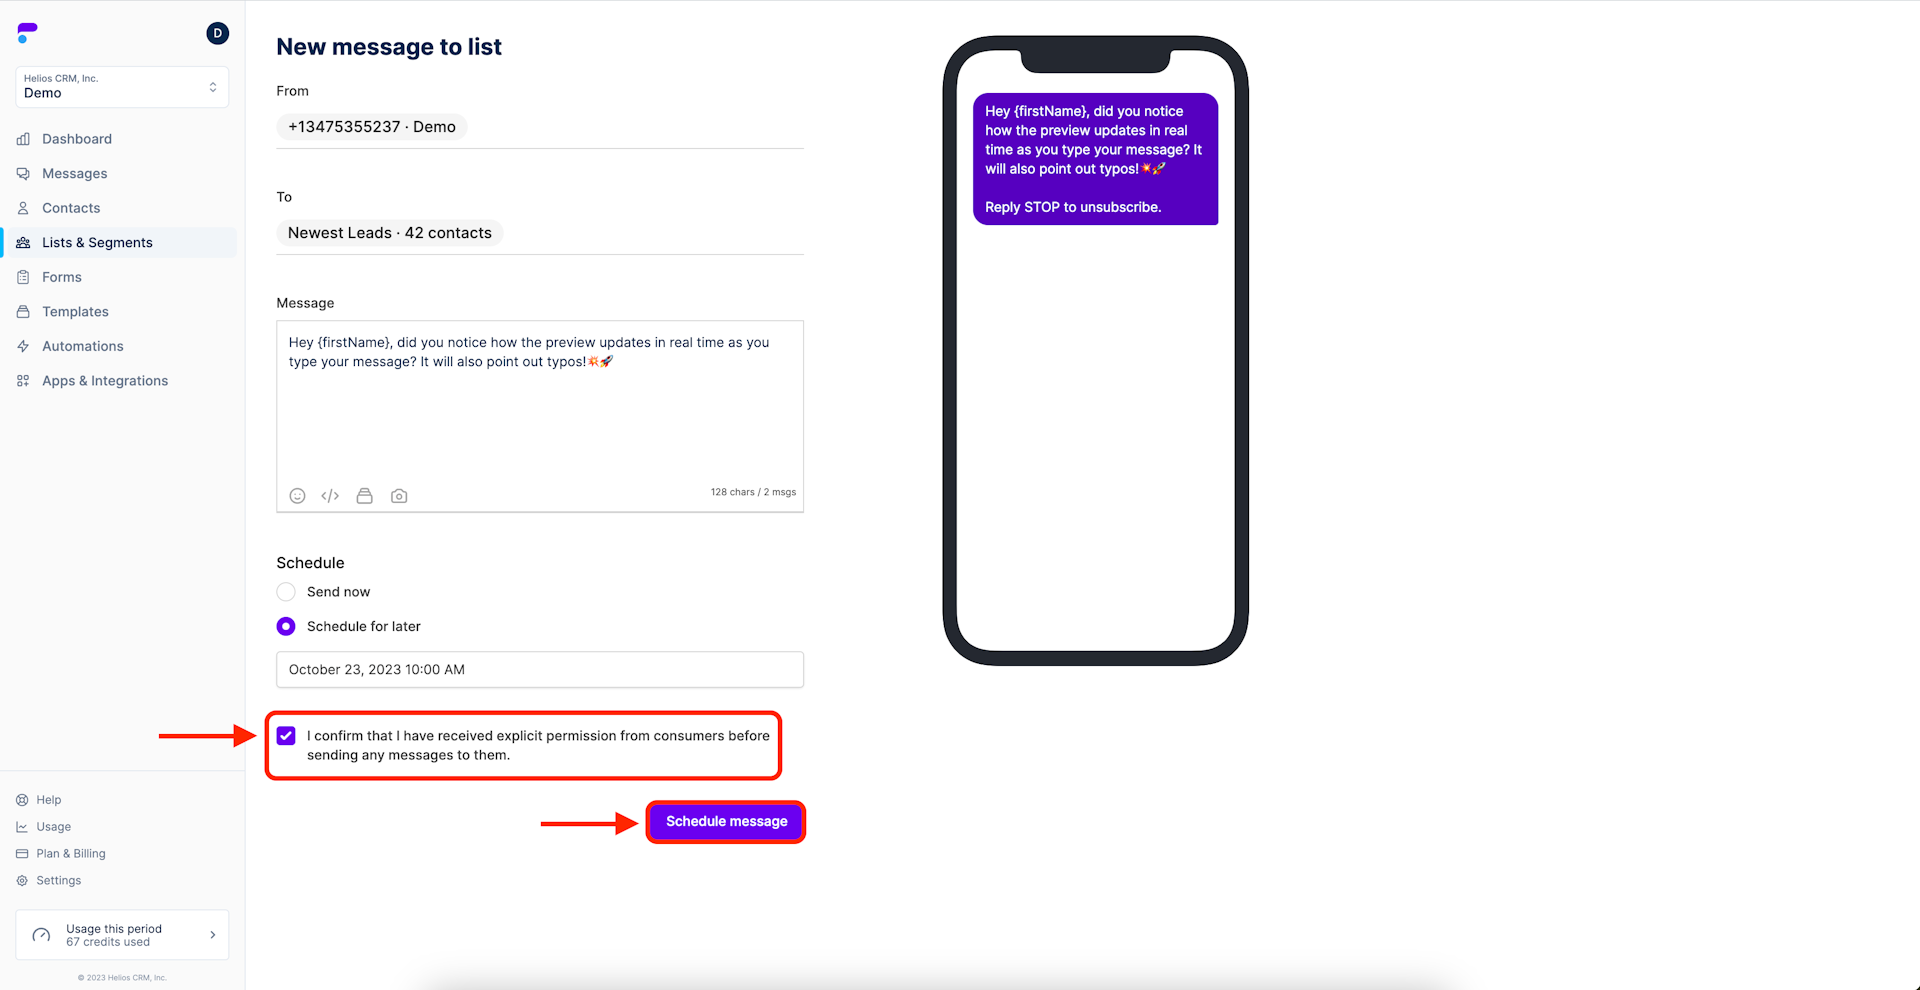
Step 9: Confirm SMS consent and send (or schedule) your message
Confirming that your audience has given expressed consent to receive messages is another auto-compliance feature. Simply click the checkbox. After a final review, click the send (or schedule) button.
Note: if you are unsure about TCPA and other compliance laws feel free to check our other help center articles, or, go directly to the governing websites.
Step 10: Confirm (optional)
If you've scheduled a message, it will be displayed on the messages tab of the corresponding list. The message can be edited or cancelled at any time by selecting the menu icon to the right of the message and selecting edit or delete from the dropdown menu.

Additional bulk messaging features
Additional features are found in the messaging bar (shown below)

Emojis
Emojis are a great way to liven up your message and catch your audience's attention.
To insert emojis, click the emoji icon and the full menu will appear. You'll notice every emoji you are used to from iPhone and Android. You can search emojis via the search bar or click the top icons for faster navigation. To insert an emoji, click it, exactly as you would on your phone. The emoji should immediately appear in your preview.
Automations
While Helios has many automations, the shortcut to in-message automations can be found in the message bar (circled in blue below).
For the message in this walkthrough, we chose the firstName automation, which will automatically insert each users first name. This is a great way to add a personal touch.
The automation you chose will be displayed in the preview. None of your customers will see {firstName}. If there is a customer that does not have a first name, the field will simply be left blank for them. So instead of "hey name!" they'll see "hey!". Once you see the automation in your preview, it is set and you can move on to scheduling or other features.
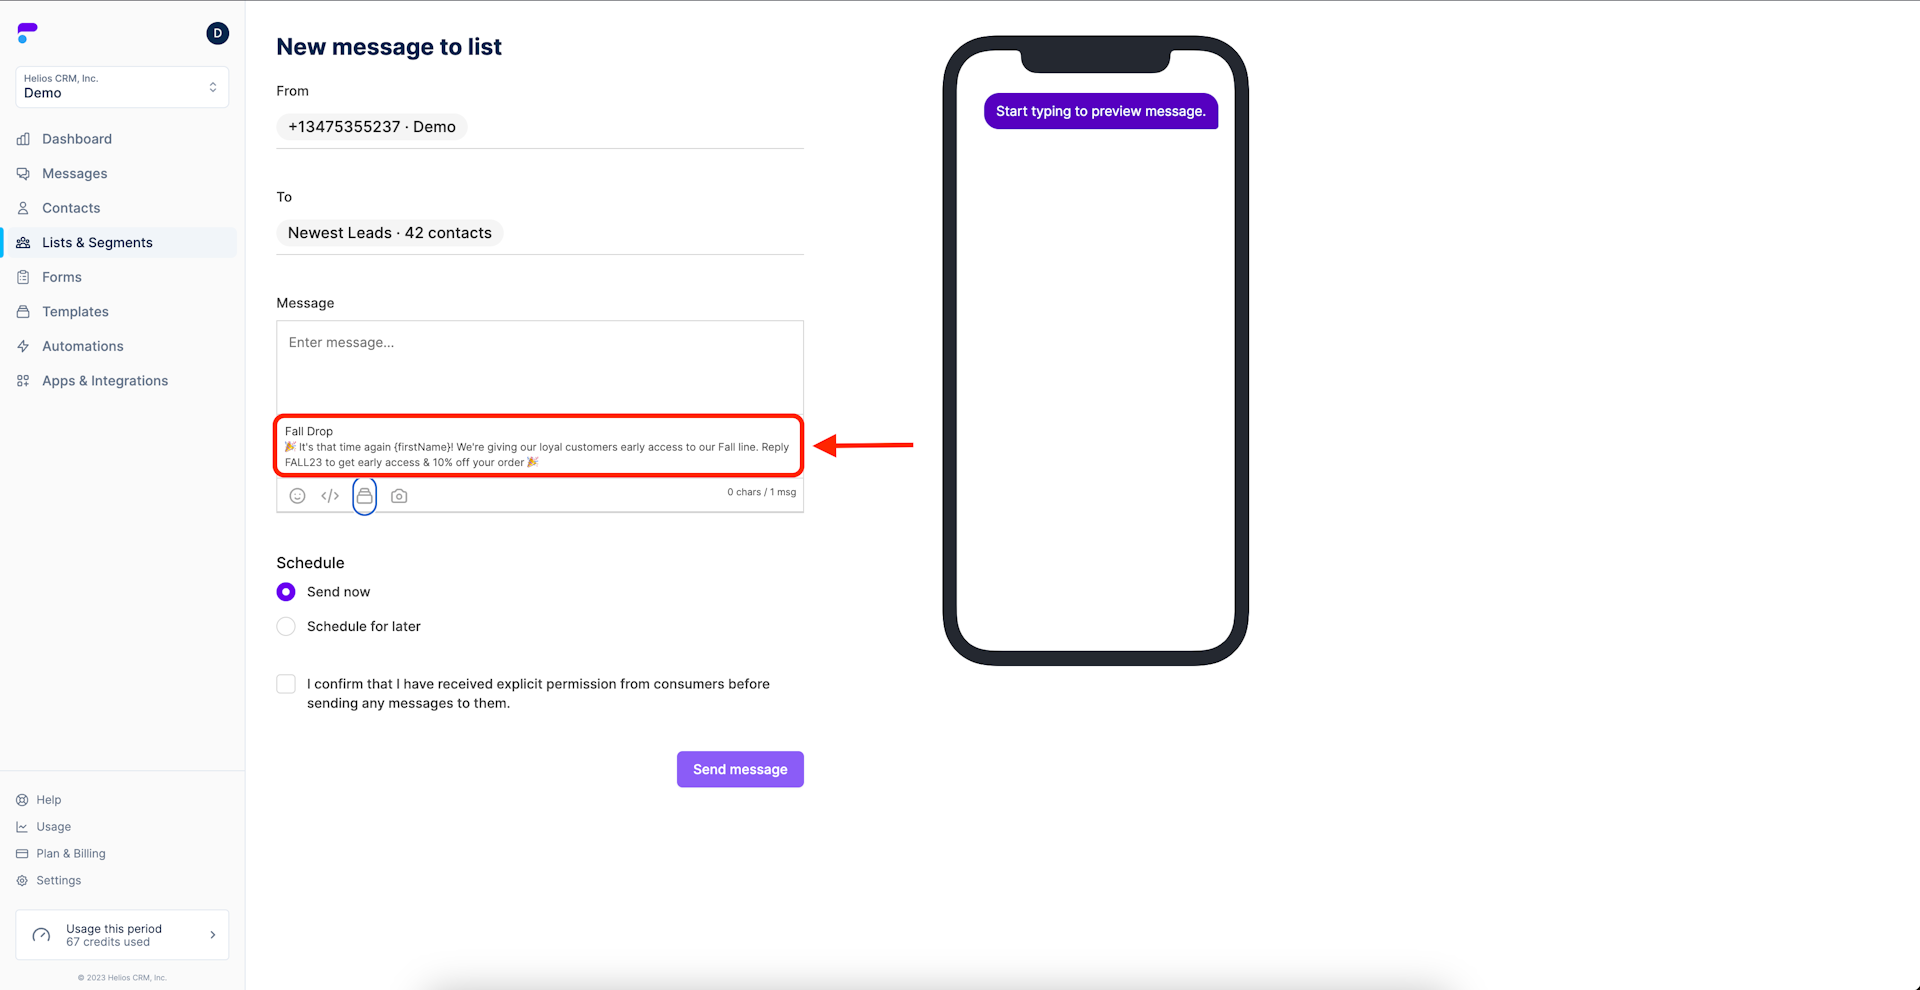
Loading a Template
Templates are great. They save time and money while reducing errors and internal miscommunication. SMS templates are easy to build, especially if you use a tool like ChatGPT to help you out!
For this tutorial, we'll assume you already have a template. Simply click the template icon (circled in blue below). Your templates will appear at the bottom of the message box. When you see the one you'd like to use, click it.
The tutorial message will now show in the preview and you can move on to using other features or sending.
Add Media like Pictures, Graphics, or Video to your Message
MMS is a great way to engage your audience. To add media files to your message, select the MMS icon from the message bar (circled in blue below).
After clicking the icon, select the media you'd like to add. In this example I'll be adding an ad graphic.

Your graphic will now be visible in the message builder.
Once the media is visible in the builder, you can add more Helios features, or send your message.