Call setup
Decide how incoming calls to your Helios number are handled (voicemail or forwarding).
Your Helios phone number handles voice as well as text, and calling is included with every plan. It doesn’t consume message credits. Before your team takes calls, decide what happens when someone dials your number.
Choose how calls are handled
Open the Calls page and click Voice settings (the same options live under Settings → Inboxes → your inbox → Voice Settings).
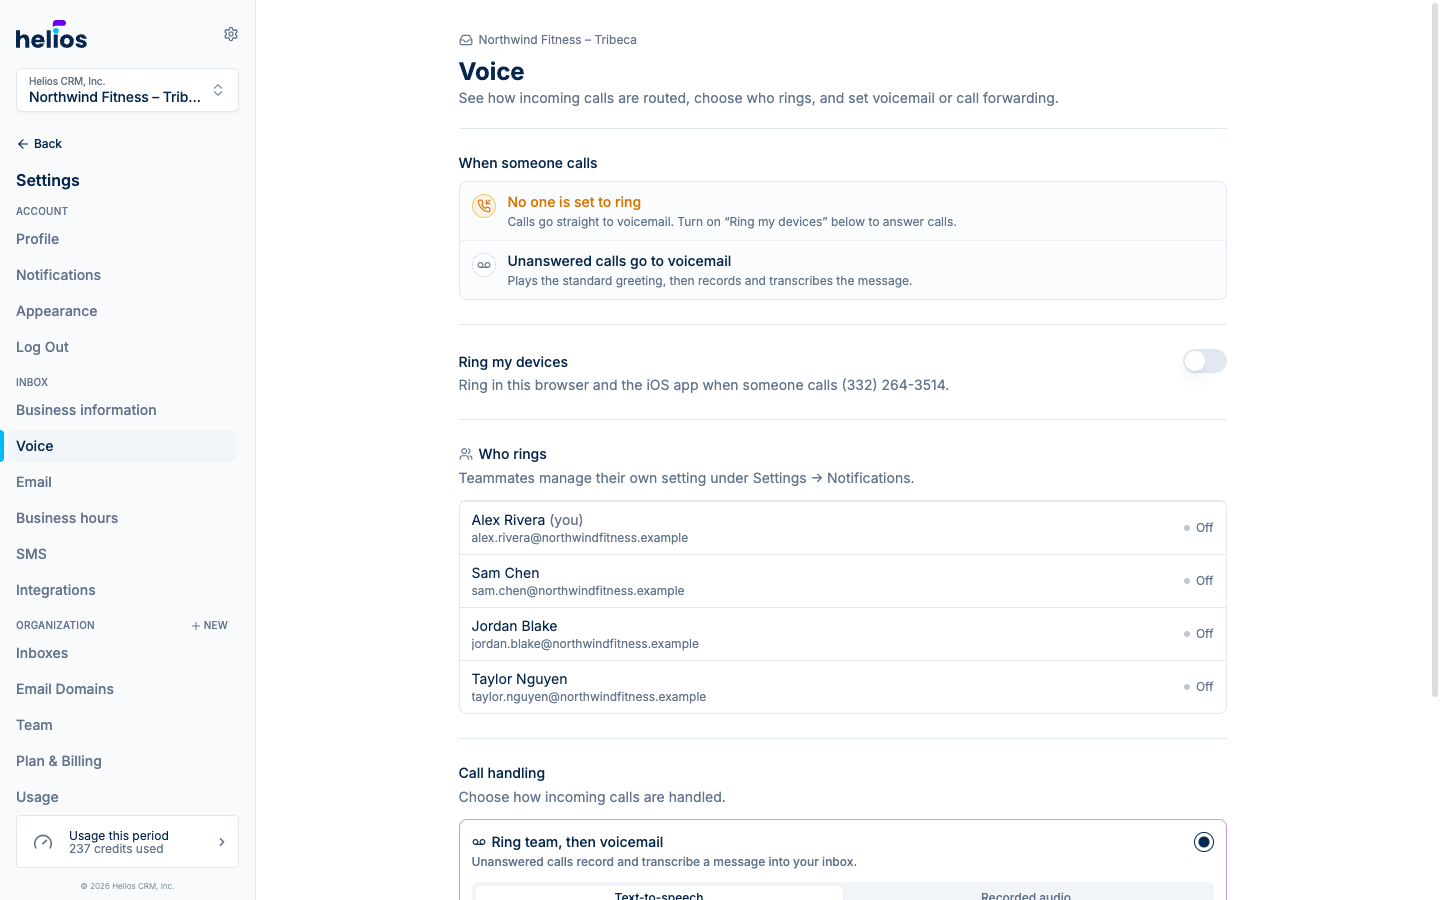
When someone calls, one of two things happens after ringing:
Helios rings your team’s devices for 30 seconds. If nobody answers, the caller hears your greeting and can leave a voicemail, which is recorded, transcribed, and dropped into the conversation thread.
Write your greeting text in the settings. Helios converts it to natural speech, so there’s nothing to record.
Calls are forwarded straight to another phone number, for example, your front desk landline or a manager’s cell. Enter the forwarding number in the settings.
With forwarding on, Helios doesn’t ring team devices or take voicemails; the destination number handles the call.
Who rings
With voicemail mode on, the Who rings section lists your teammates and whether incoming calls ring their devices. Each person controls their own setting: under Settings → Notifications, the Incoming calls section has a toggle per inbox to ring that browser when the inbox number is called. The iOS app rings like a normal phone call.
Next steps
- Making and receiving calls: the dialer, in-call controls, and answering.
- Call log and voicemail: reviewing history and listening to voicemails.