Getting Started
Signing Up for Helios
Welcome to Helios
Creating an account with Helios is fast and simple. In fact, everything on Helios is designed to be fast and simple. Signing up for an account takes less than two minutes. Let's begin.
Step 1: Get started
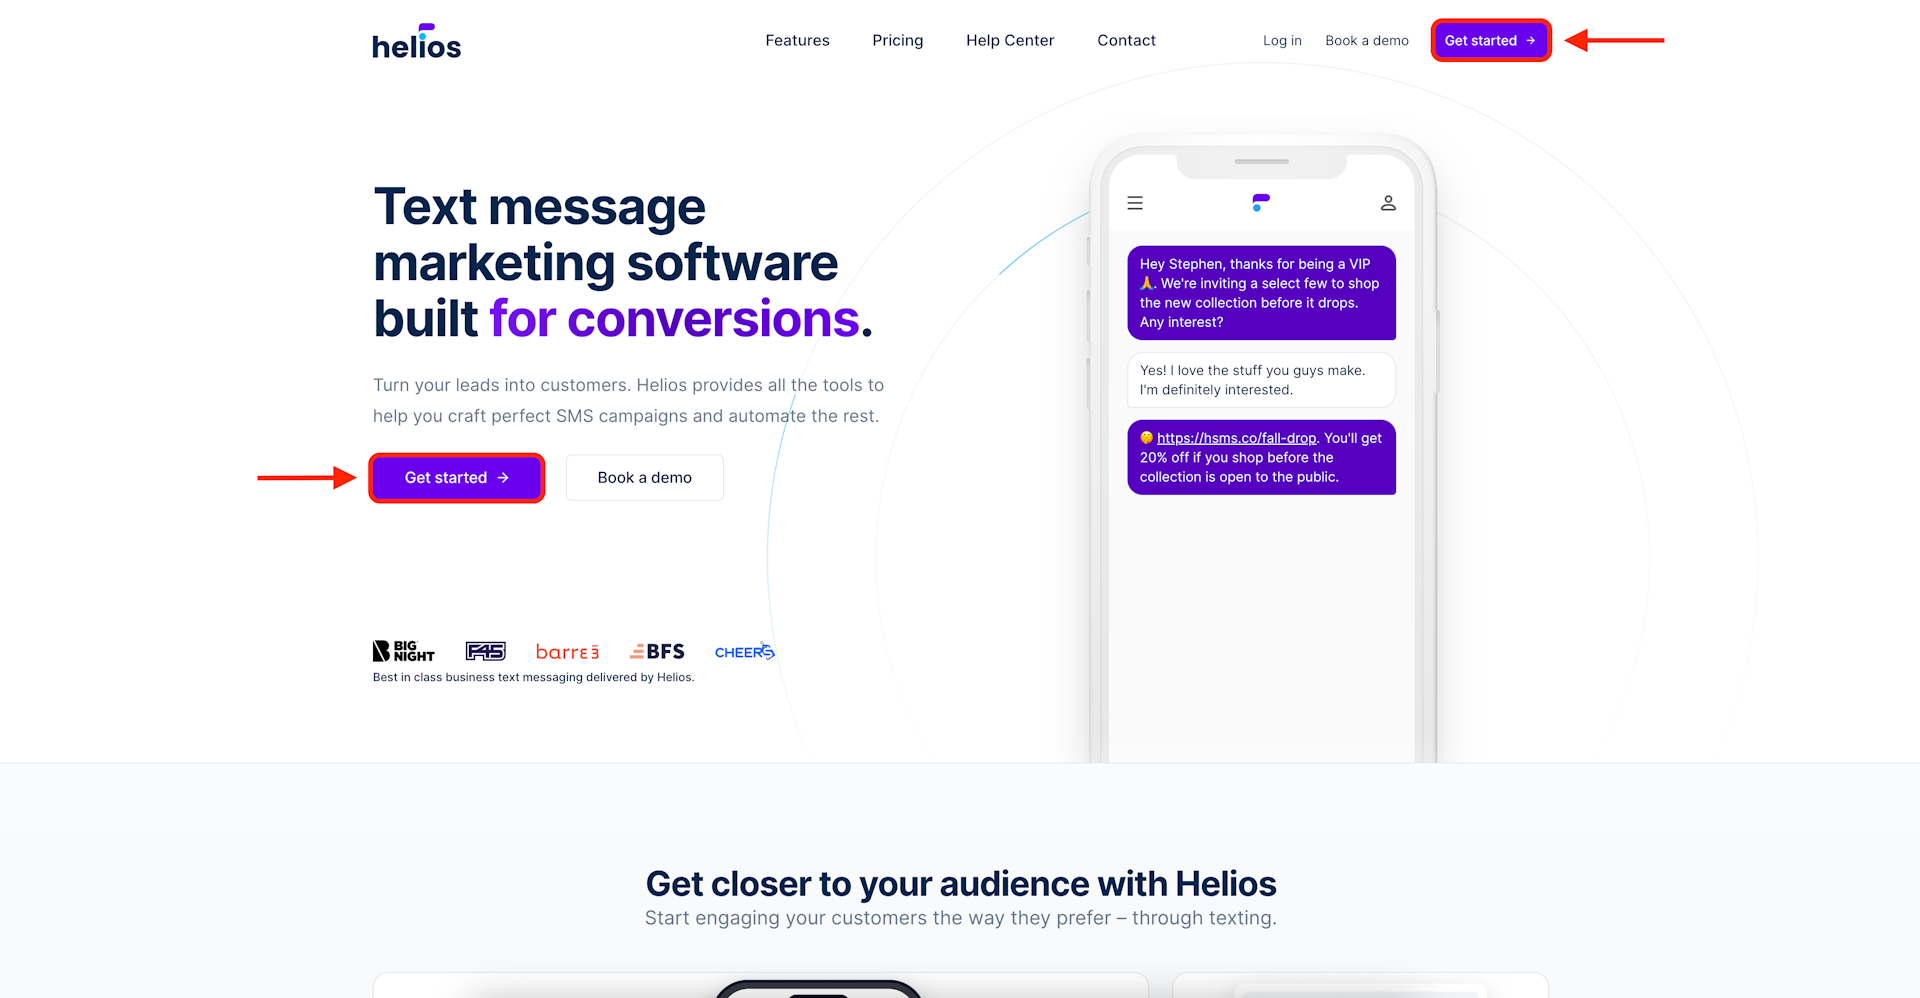
Select Get started from the homepage (https://sendhelios.com).
Step 2: Create your account
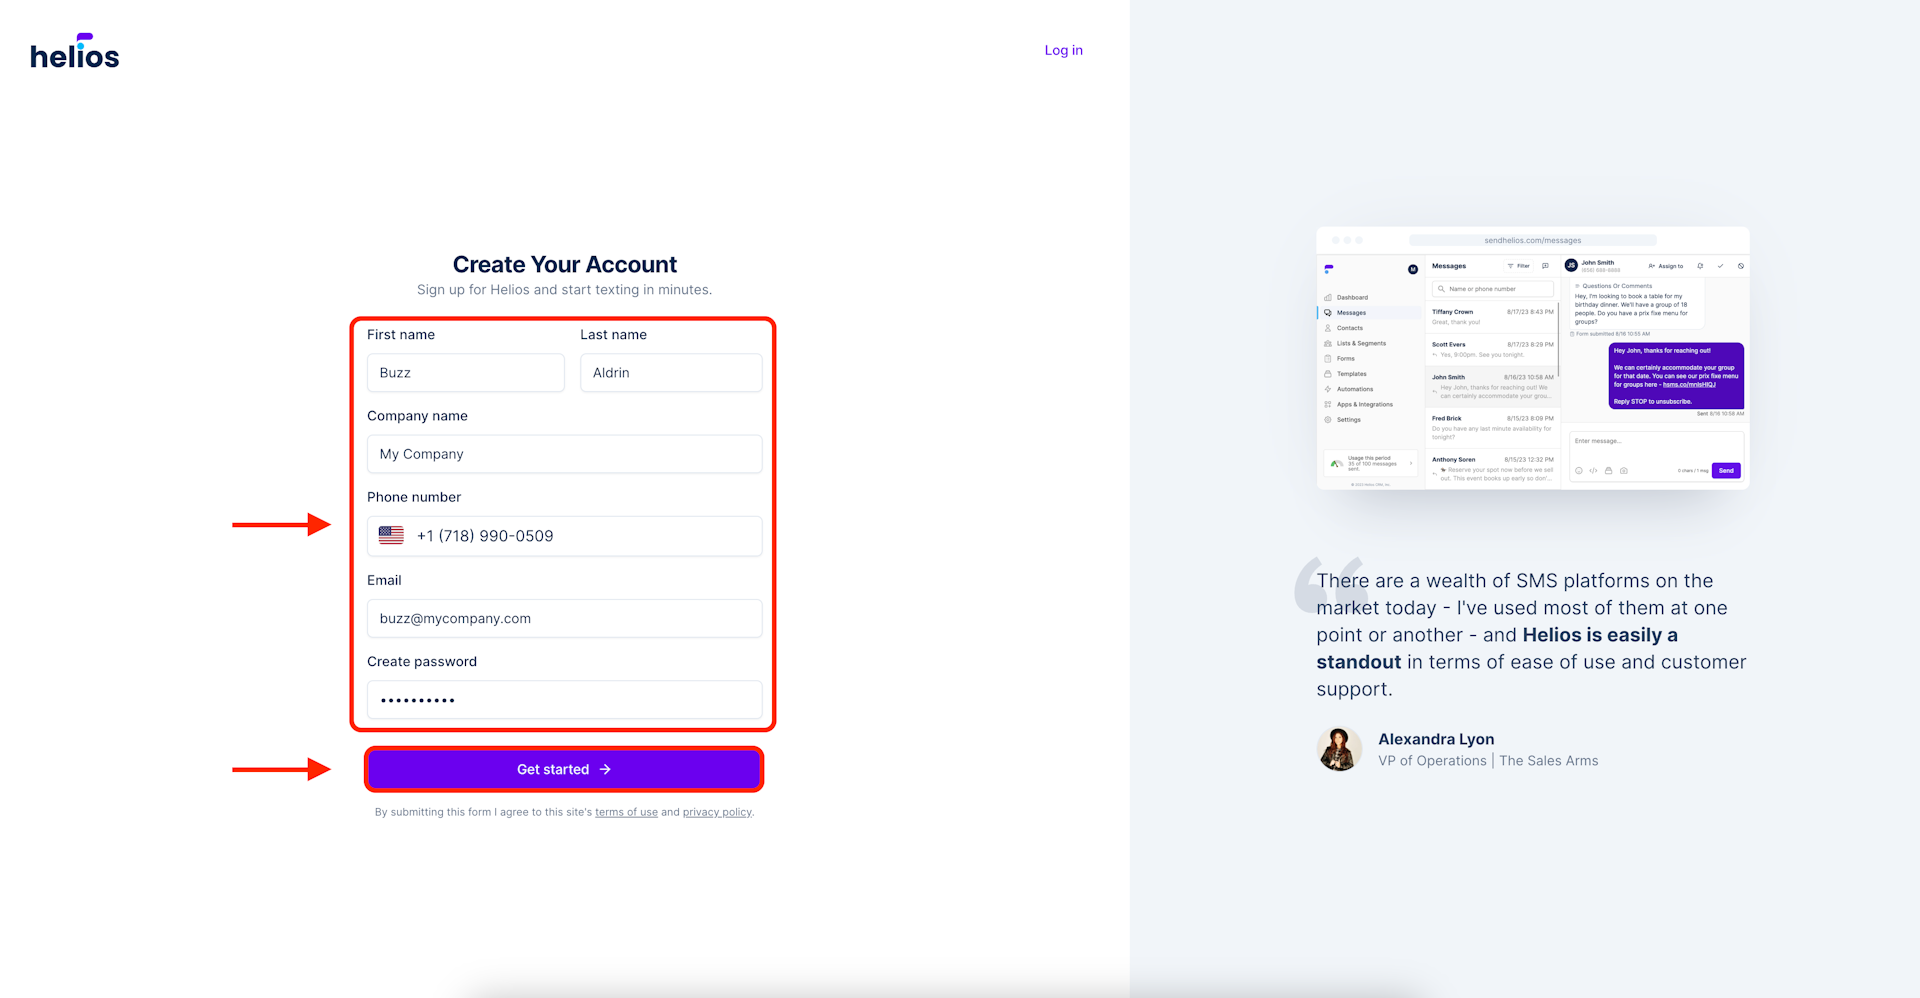
Begin creating your account by entering your first name, last name, company, current phone number, email address, and new password.
Note that communications from Helios, including billing, usage, feature updates, and company news will be delivered to the email address you provide.
Once you've completed the form select Get started.
Step 3: Create your inbox
You can create as many inboxes as your business requires once you've created the first. For example, you can have an inbox for sales, a separate inbox for customer service, and so on.
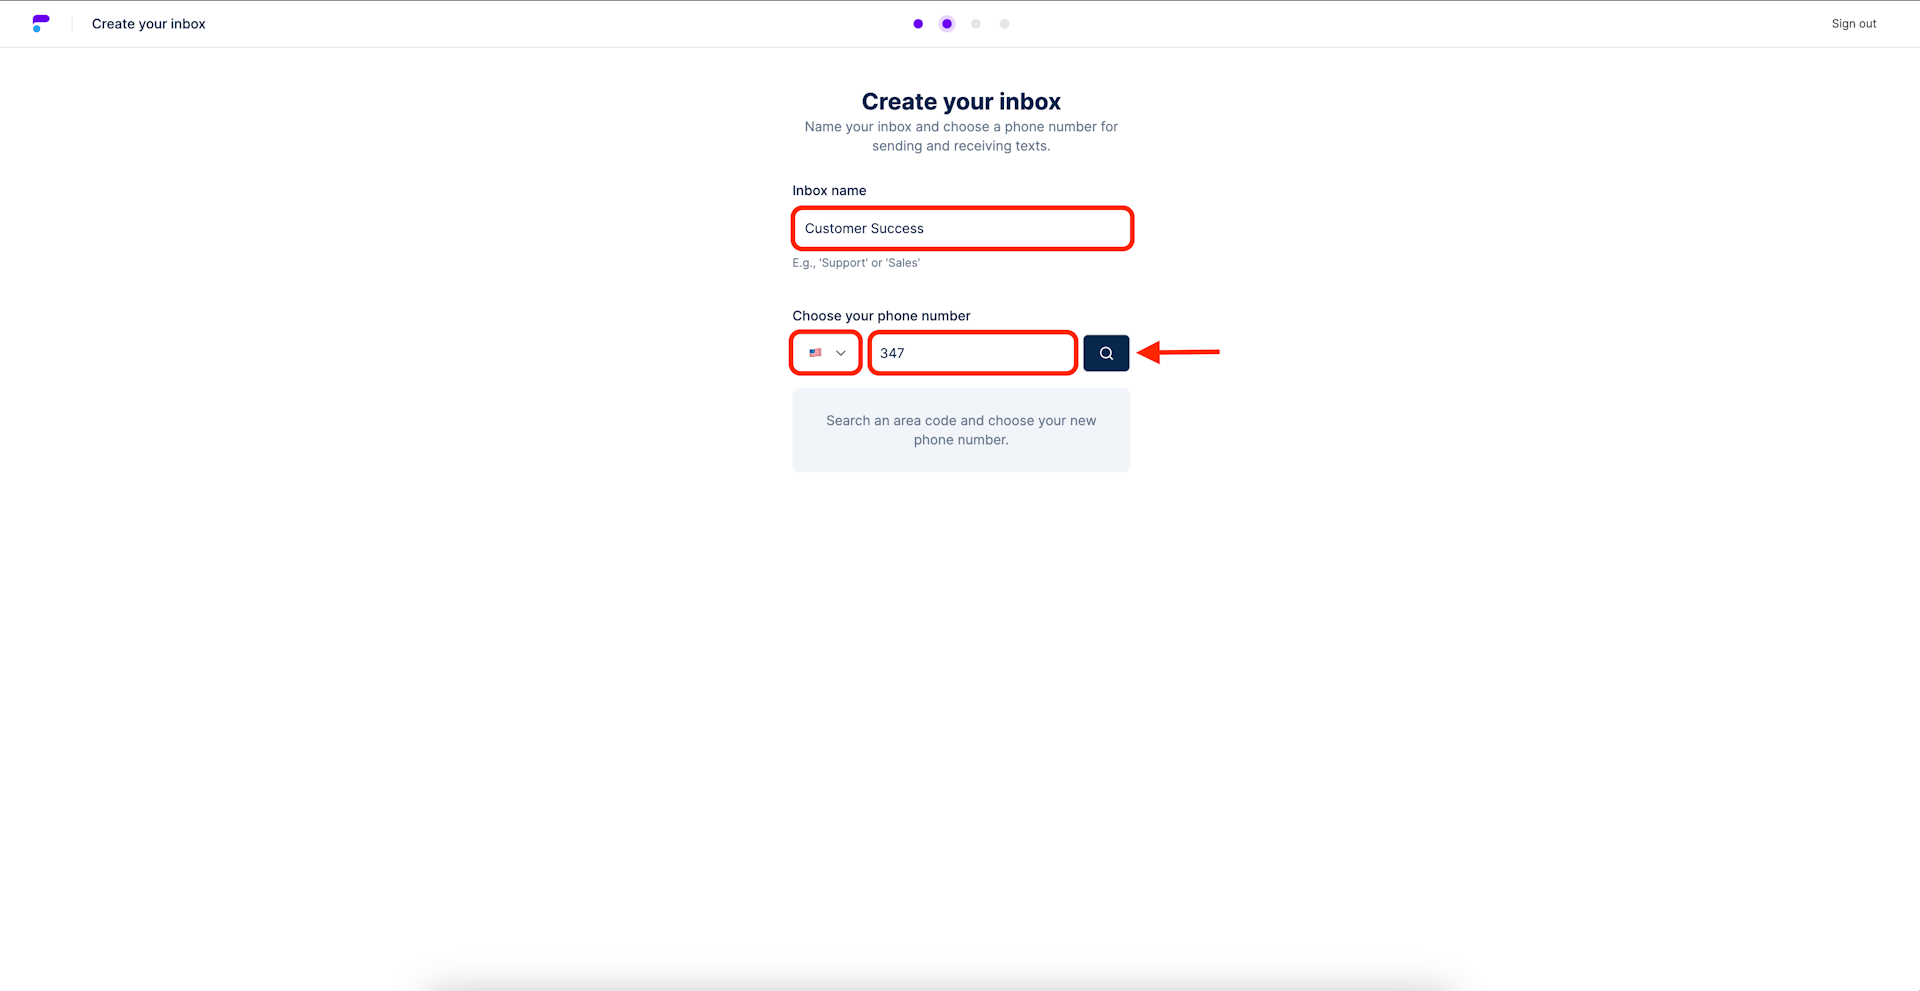
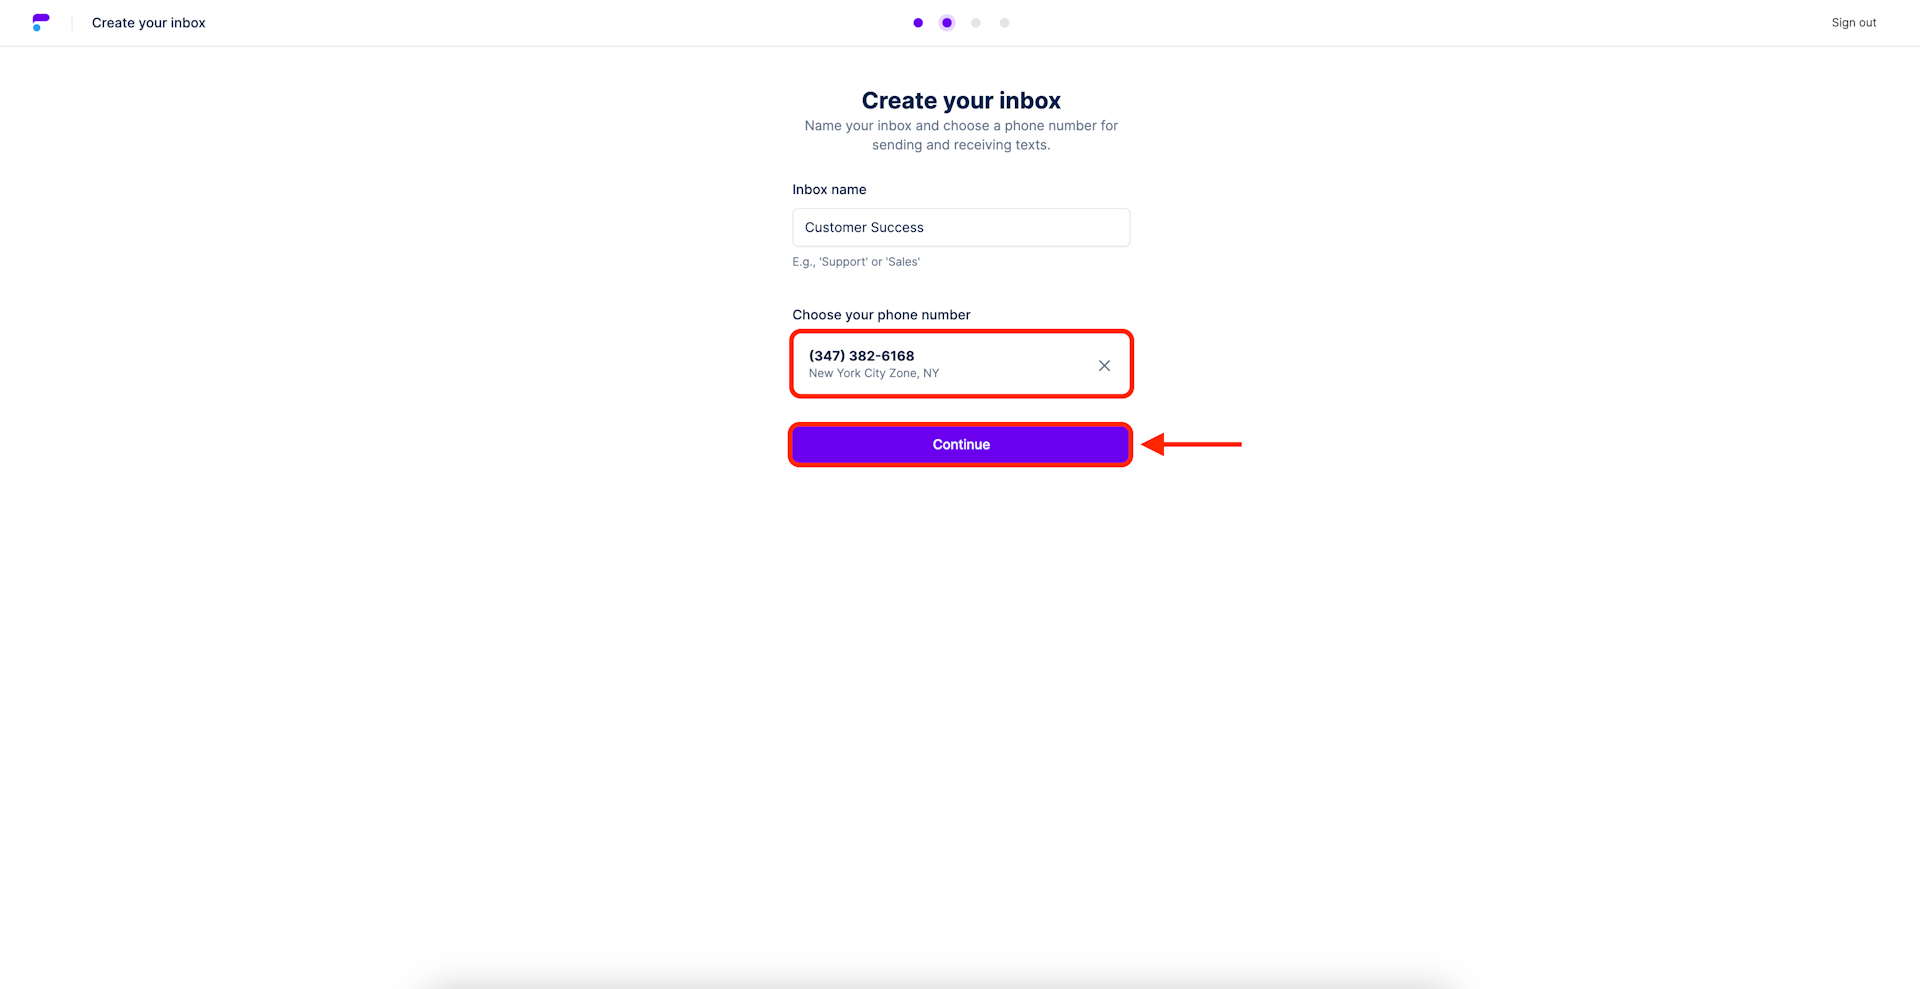
To begin, you'll need to name your first inbox. In this instance, I chose Customer Success.
Next, select your country, which will be set to USA by default. Then enter the area code that you would like your helios number to have. In most instances businesses will choose an area code that is local to their storefront or headquarters.
Once all the fields are filled click the search icon (to the right of the area code) to see which numbers are available.
Step 4: Choose your new Helios phone number
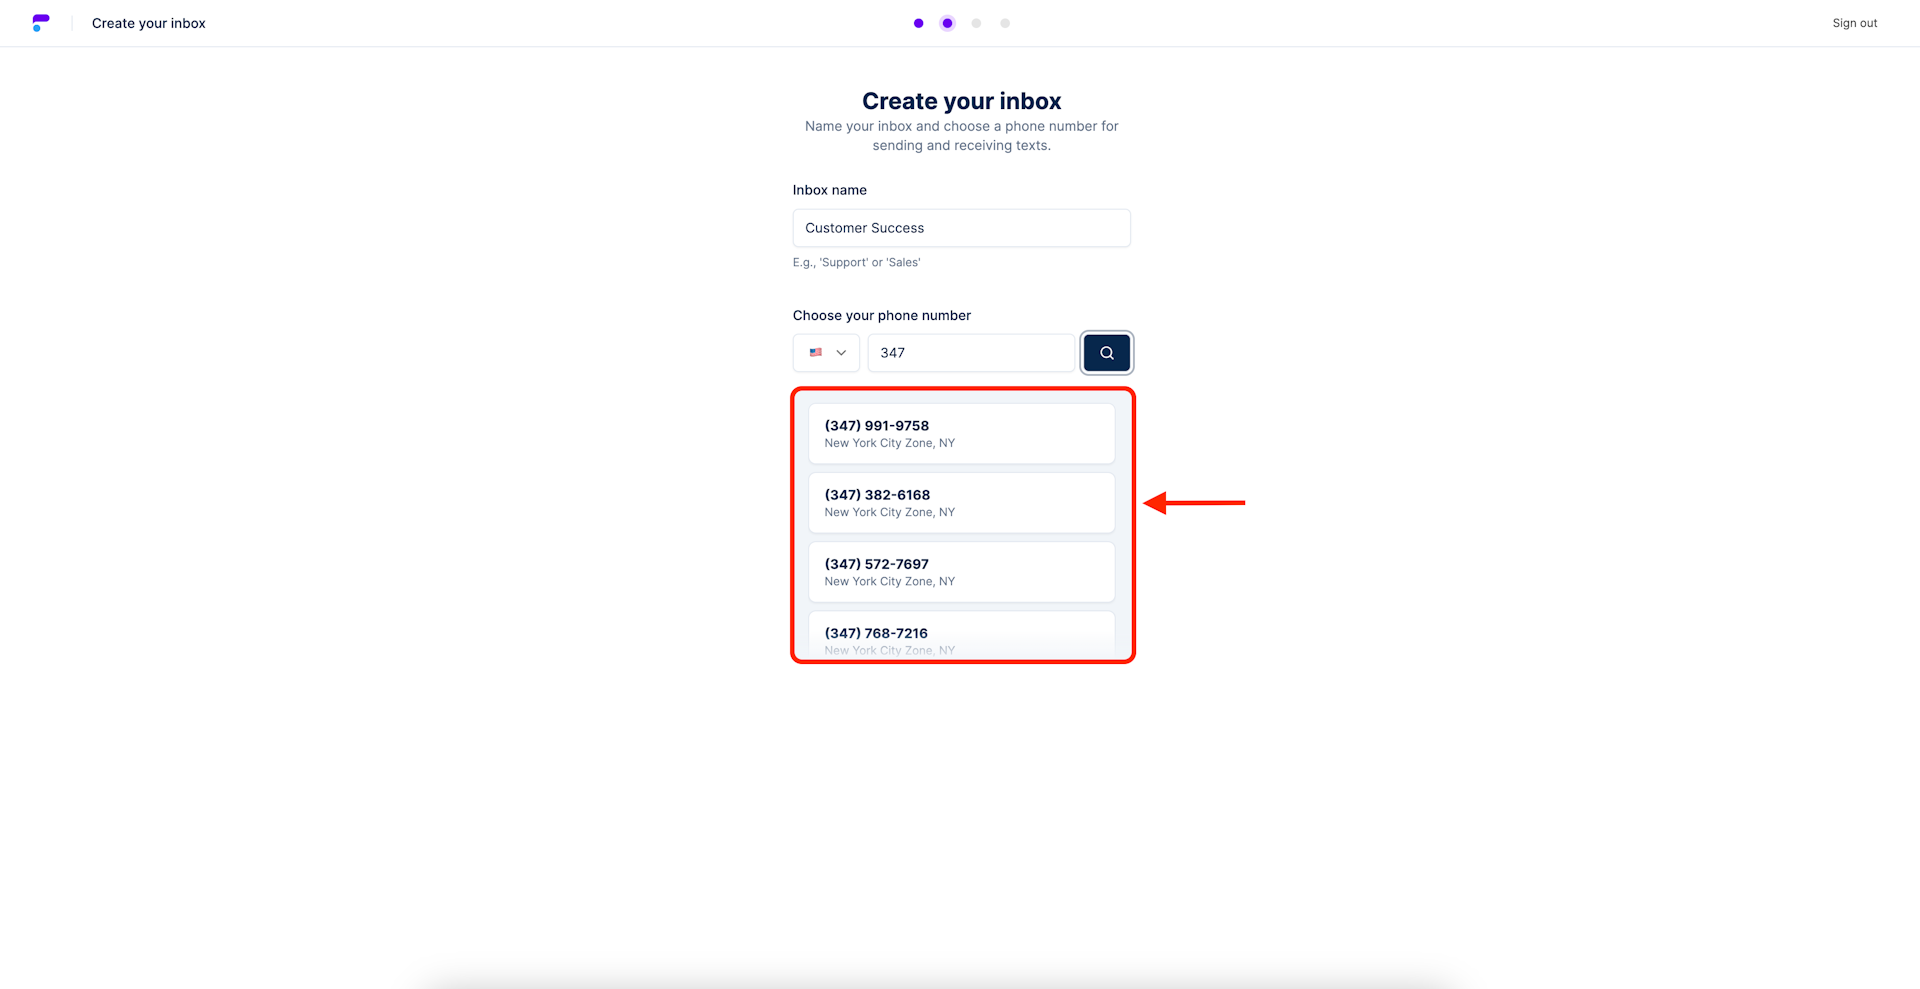
A dropdown of available phone numbers will appear. Scroll through the options and select the number that appeals to you by clicking it.
Step 5: Confirm the inbox name and phone number
Your chosen inbox name and phone number will be displayed.
If you'd like to change the name of your first inbox, simply click the displayed name, erase it, and type a new one. If you'd like to change the phone number you've selected, select the X icon to the right of the number. This will bring you back to the phone number selection modal.
Once everything looks right select continue.
Step 6: Choose your plan
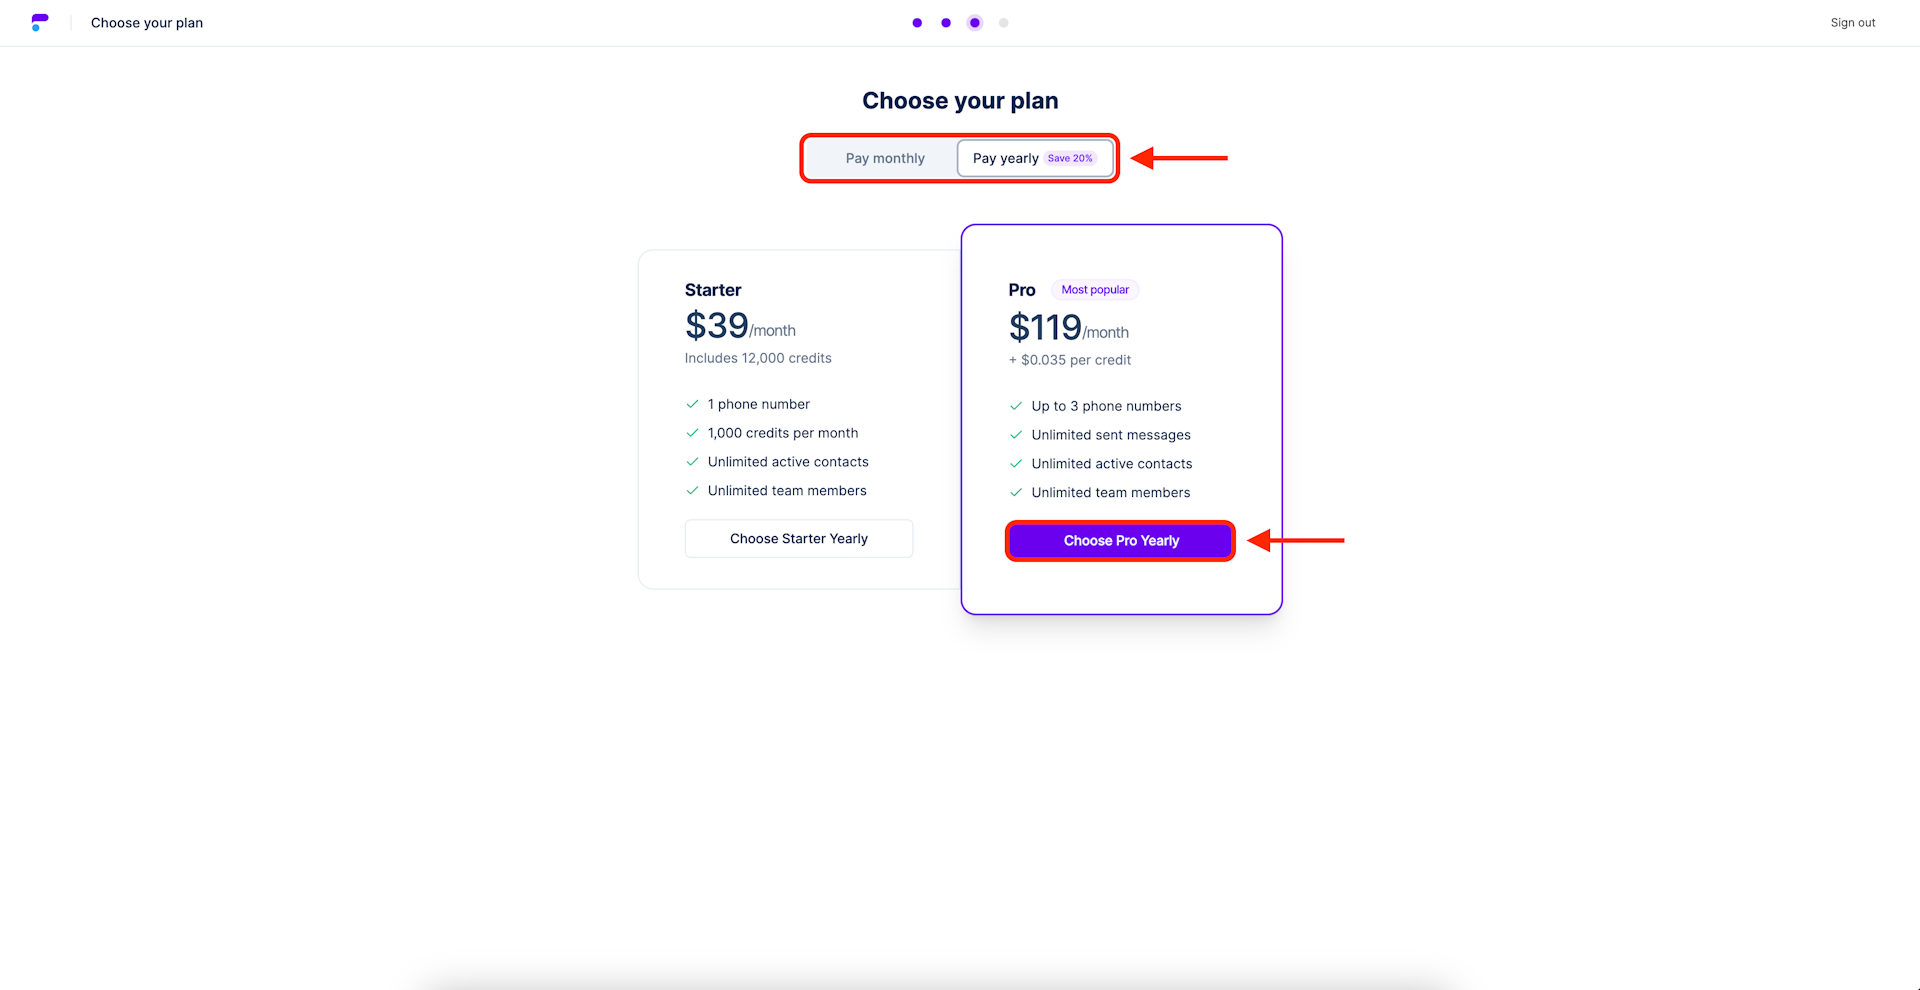
Choosing a plan is simple. Consider your usage. If you send more than 1,000 message per month we recommend choosing our most popular Pro plan. If you send less than 1,000 messages per month, we recommend our Starter plan.
Also, decide whether you'd like to be billed annually or monthly by clicking the toggle at the top of the screen. I chose Pay yearly to unlock the 20% savings.
Once you have the plan and billing you prefer, select the corresponding choose button. The button will always state your plan preference before it is clicked. In this example I selected Choose Pro Yearly based on my preferences.
Step 7: Enter payment method
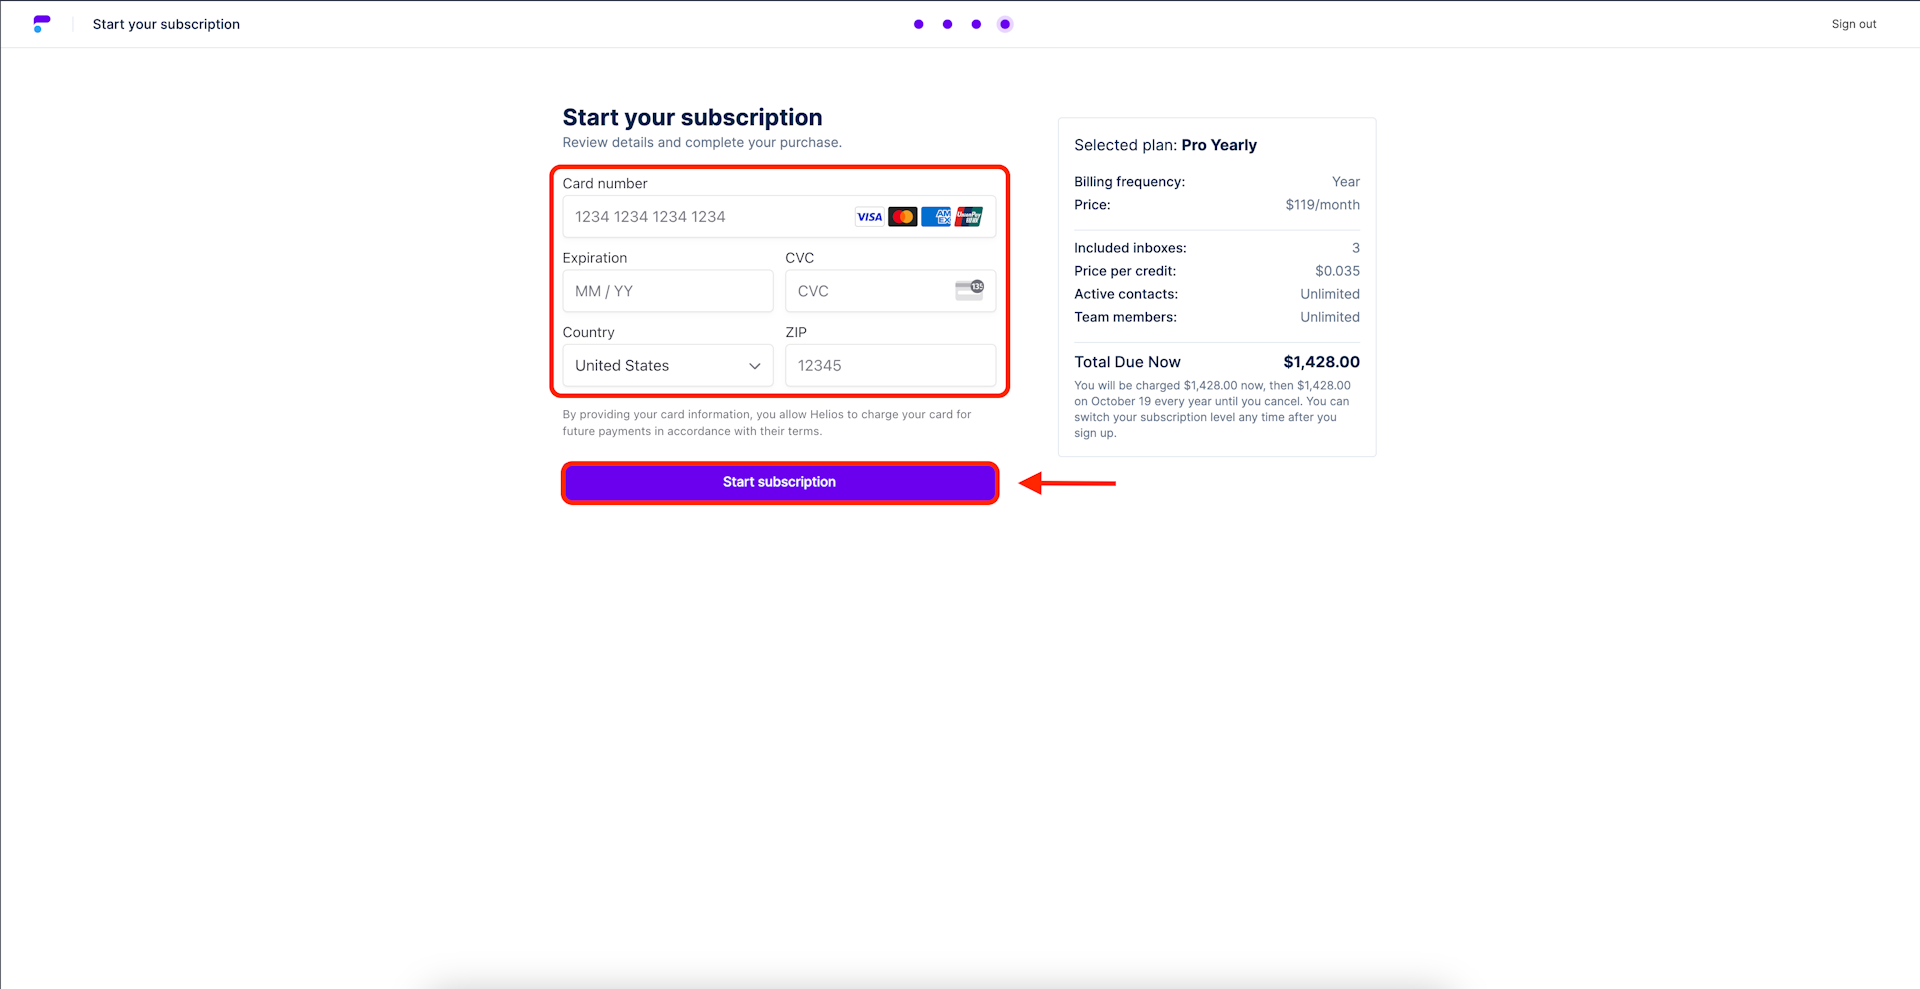
A preview of your plan will be shown to the right of the payment form. This way you know exactly what you're paying for. Full transparency, no surprises.
After reviewing the plan preview, enter your payment information including your credit card, expiration, CVC, country and billing zip code.
Once the form is complete, select Start subscription.
Note: if you'd like to pay by ACH, contact us about an enterprise plan.
Sign up complete
You've successfully started your subscription and can begin importing contacts and sending messages immediately. A receipt for your initial payment will be automatically emailed to the email address you provided earlier.
Thank you for choosing Helios!
