Building forms
Capture leads with hosted forms that create contacts automatically.
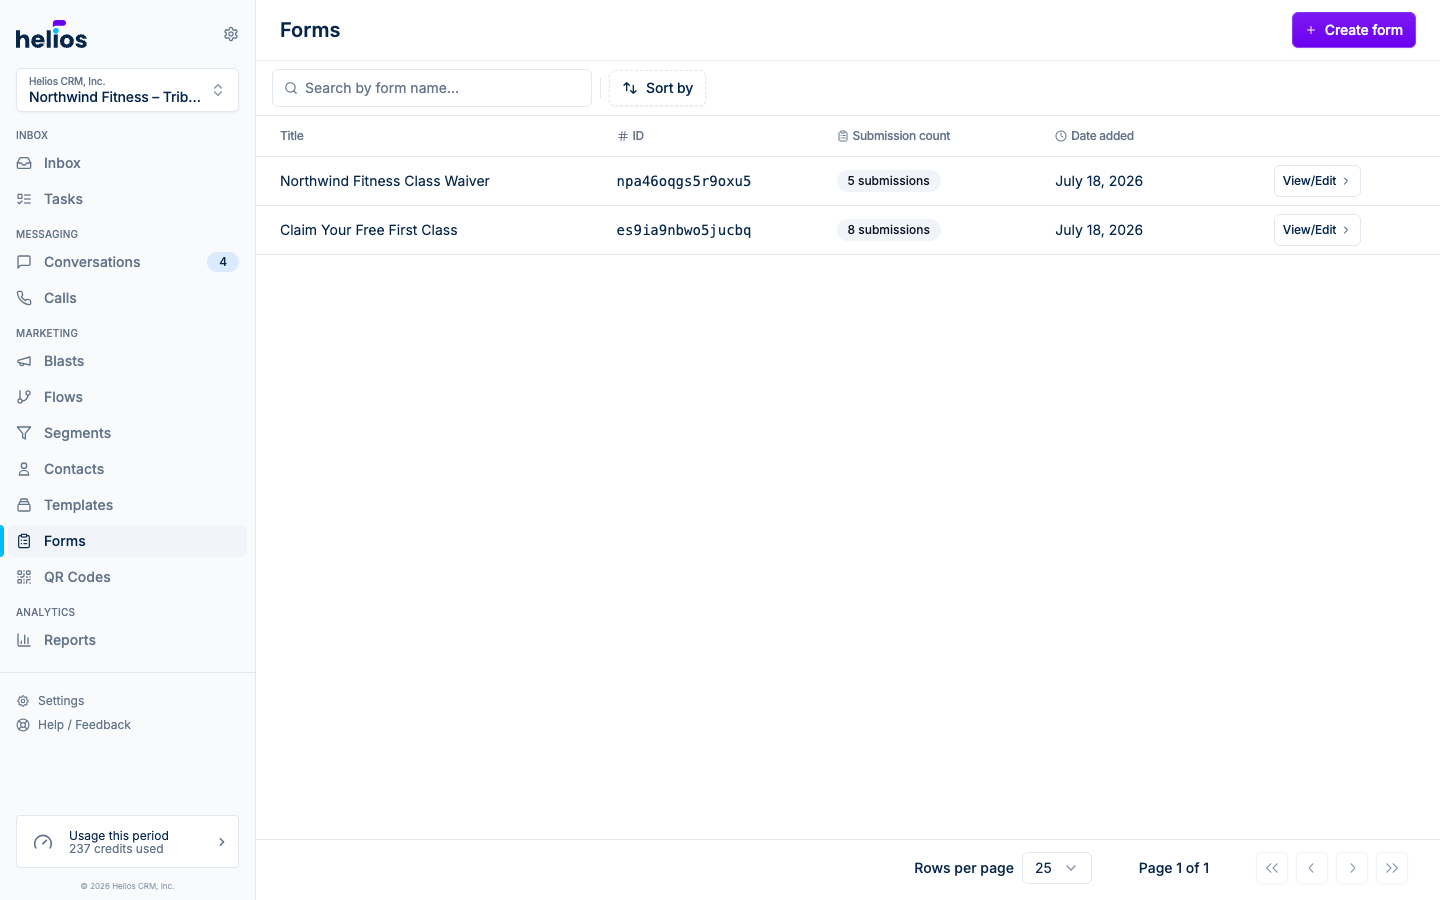
Forms turn website visitors into contacts you can text. Every submission creates (or updates) a contact, can add them to a list, and can even land in your inbox as a message, so a “free trial” form submission starts a conversation, not a spreadsheet row.
The Forms page lists your forms with submission counts; click Create form to build one.
The form builder
The builder is a settings column on the left and a live Form preview on the right.
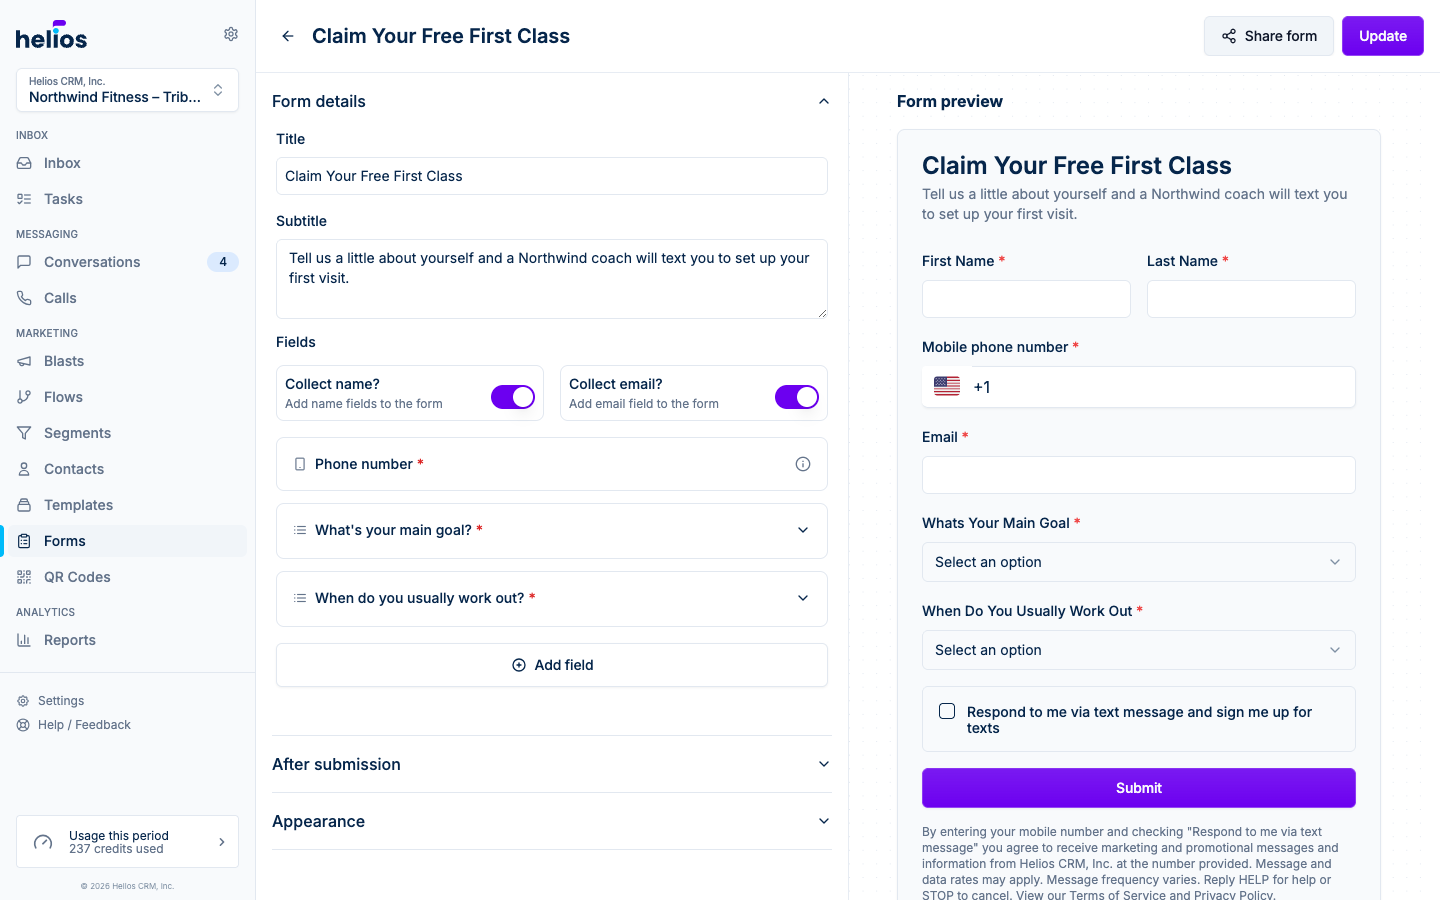
Form details
- Title and Subtitle: the heading copy on the form.
- Fields: Phone number is always included and required (it’s how the contact gets created). Toggle on Collect name? and Collect email? for the standard extras.
Custom fields
Add field opens a sheet with eight field types:
| Type | Use |
|---|---|
| Text | Single-line answers. |
| Long text | Multiline answers. |
| Date | Date picker. |
| Select from list | A dropdown; add the options yourself. |
| Checkbox | Yes/no; can be required (must be checked). |
| Validated email input. | |
| Phone | Validated phone input. |
| Number | Numeric input. |
Each field gets a Label, optional Placeholder, and a Required field? toggle. Answers are saved onto the contact as properties (named after the label), so they’re usable in segments and message personalization later.
After submission
- Message or Redirect: either show a thank-you message or send the visitor to a URL (e.g. your booking page).
- Add to list(s): put every submitter on one or more static lists. Pair with an Added to list flow trigger for instant automated follow-up.
- Send submission as message?: when enabled, the submission appears as a message in the contact’s conversation, so your team sees it in the inbox and can reply immediately.
Appearance
- Theme: Light or Dark.
- Submit button: background and text colors, to match your brand.
- Legal links: your privacy policy and terms of use URLs, shown under the form.
Click Create to save. The form is instantly live at its share link.
Next steps
- Embedding: put the form on your site or share the hosted link.
- Submissions: see who submitted and follow up.